Compost is one of the most valuable things you can make in your garden, and the ingredients are usually things you were going to throw away. Kitchen scraps, garden trimmings, fallen leaves: put them to work, and you can turn that waste into an amendment people happily pay for by the bag.
But there is a big difference between a pile that just sits there and a pile that gets hot and breaks down quickly. A well-managed hot compost pile can break down in roughly four to eight weeks, while a cold pile may take six to eighteen months. Maturation still matters, so speed is not a reason to spread unfinished material around your plants.
The trick is not a magic powder. It is giving the organisms doing the work the right food, particle size, pile volume, moisture, and airflow. Here are five practical ways to get those conditions right, plus two decisions that make the whole system easier to manage.
Table of Contents
- Key Takeaways
- How a Hot Compost Pile Works
- 1. Chop Your Ingredients Before Adding Them
- 2. Get the Browns-to-Greens Balance Close
- 3. Build Enough Pile to Hold the Heat
- 4. Keep the Moisture Right Throughout the Pile
- 5. Turn the Outside Material Into the Hot Center
- Let Compost Mature Instead of Restarting It Forever
- Do You Need a Compost Activator?
Key Takeaways
- Chop ingredients into smaller pieces while retaining coarse browns that keep air moving through the pile.
- Start with two to three buckets of browns per bucket of greens, then adjust as needed.
- Build roughly 27 to 30 cubic feet of evenly moist material to support sustained heat.
- Turn outer material into the hot center, then keep fresh scraps separate while the batch matures.
How a Hot Compost Pile Works
Every compost pile starts with two broad categories of ingredients: greens and browns.
- Greens provide nitrogen and moisture. Think fresh garden trimmings, kitchen scraps, chicken manure, or that zucchini you forgot to harvest until it became a small canoe.
- Browns provide carbon and structure. Dry leaves, straw, wood chips, and dry, crispy plant material help balance the greens and keep the pile open enough for air to move through.
Those ingredients do not turn into compost by themselves. Microbial life does the heavy lifting. Bacteria consume the material, multiply, and release heat. Fungi and other decomposers contribute too, but bacteria are especially important when we are trying to make compost quickly.
A hot compost pile moves through three main stages:
- Initial warming, or the mesophilic phase. At moderate temperatures, up to roughly 104°F, bacteria begin consuming readily available food, including simple sugars. Their activity warms the pile.
- Hot breakdown, or the thermophilic phase. At roughly 104°F to 160°F, heat-loving bacteria become active. They multiply rapidly and break down more complex materials, including proteins and fats. This is where much of the fast decomposition happens.
- Cooling and maturation. As the readily available food runs low, the pile cools. Lower-temperature organisms continue working while the material stabilizes into compost suitable for the garden.
Sustained heat also helps reduce pathogens and kill weed seeds. The important word is sustained: one hot reading in the center does not mean every ingredient has received the same treatment. Temperature, time, and moving outside material into the hot core all matter, especially when manure is involved. The EPA’s home composting guide offers additional background on managing a backyard pile.
1. Chop Your Ingredients Before Adding Them
Imagine handing a baby an entire Salisbury steak and expecting dinner to go smoothly. The food is there, but it is not in a particularly useful form.
A compost pile has a similar problem with large ingredients. Microbes work on exposed surfaces. Chopping material increases the surface area available to them, making it easier to get into stems, leaves, and other plant tissue.
A whole leafy branch may have plenty of leaves, but cutting that branch into smaller pieces opens the stem and breaks up the foliage. That small bit of preparation can make a big difference.
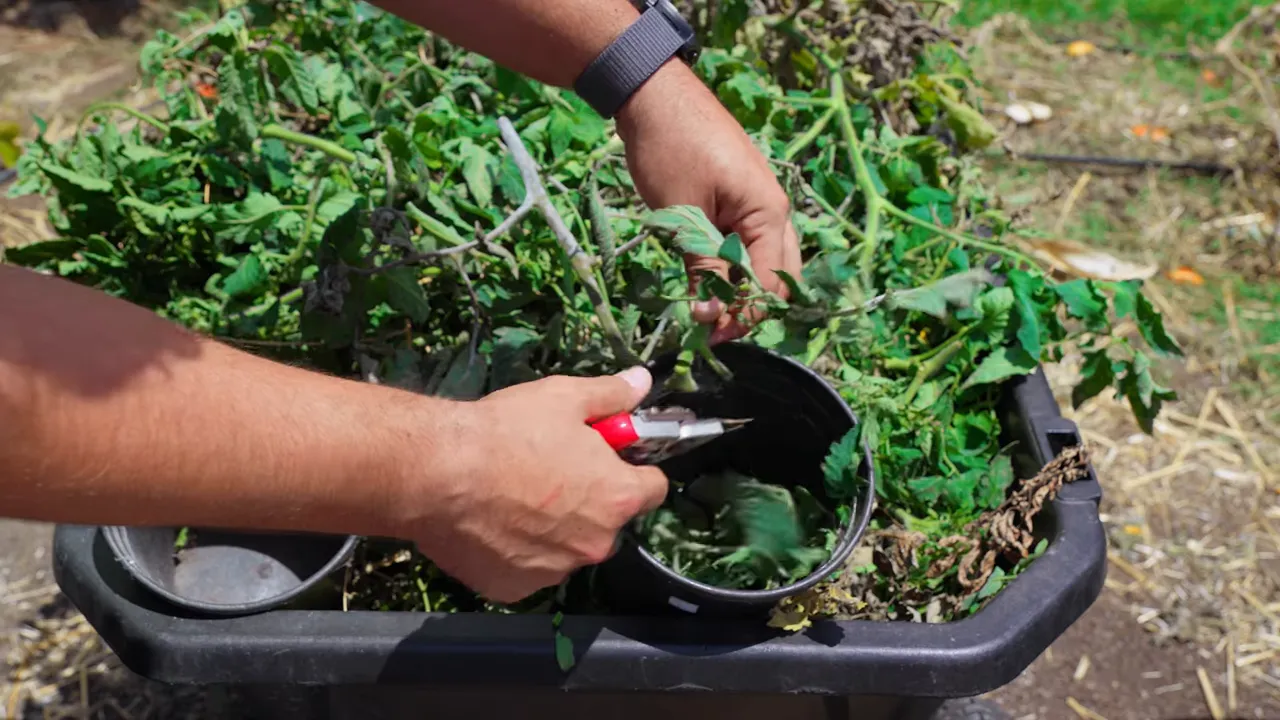
Match the tool to the material:
- Pruning shears: Keep a pair near the compost bin and snip trimmings as you bring them over.
- A chopping tool: Useful for bulky stalks and larger batches that would take forever with hand pruners.
- A lawn mower: Handy for shredding loose leafy material and fallen leaves.
- A chipper shredder: Better suited to thicker, woody material that needs more aggressive size reduction.
There is one catch: do not turn the entire pile into uniformly fine mush. Very small particles can mat together, squeezing out the air spaces your compost needs.
For greens, pieces around half an inch to an inch are a useful target where practical. Leave some browns a little coarser to provide structure. We want plenty of exposed surface area, but we also want a pile that can breathe.
2. Get the Browns-to-Greens Balance Close
The target carbon-to-nitrogen ratio for fast composting is roughly 25:1 to 30:1. That is the ratio of carbon to nitrogen in the combined materials, not a requirement to add thirty buckets of browns for every bucket of greens.
Every ingredient has a different composition. You could get deep into calculations and weighing materials, but that is not necessary for a useful backyard starting point.
Start with about two to three buckets of browns for every bucket of greens, measured by volume. Three parts browns to one part greens is a simple rule of thumb, then you can adjust based on how the pile behaves.
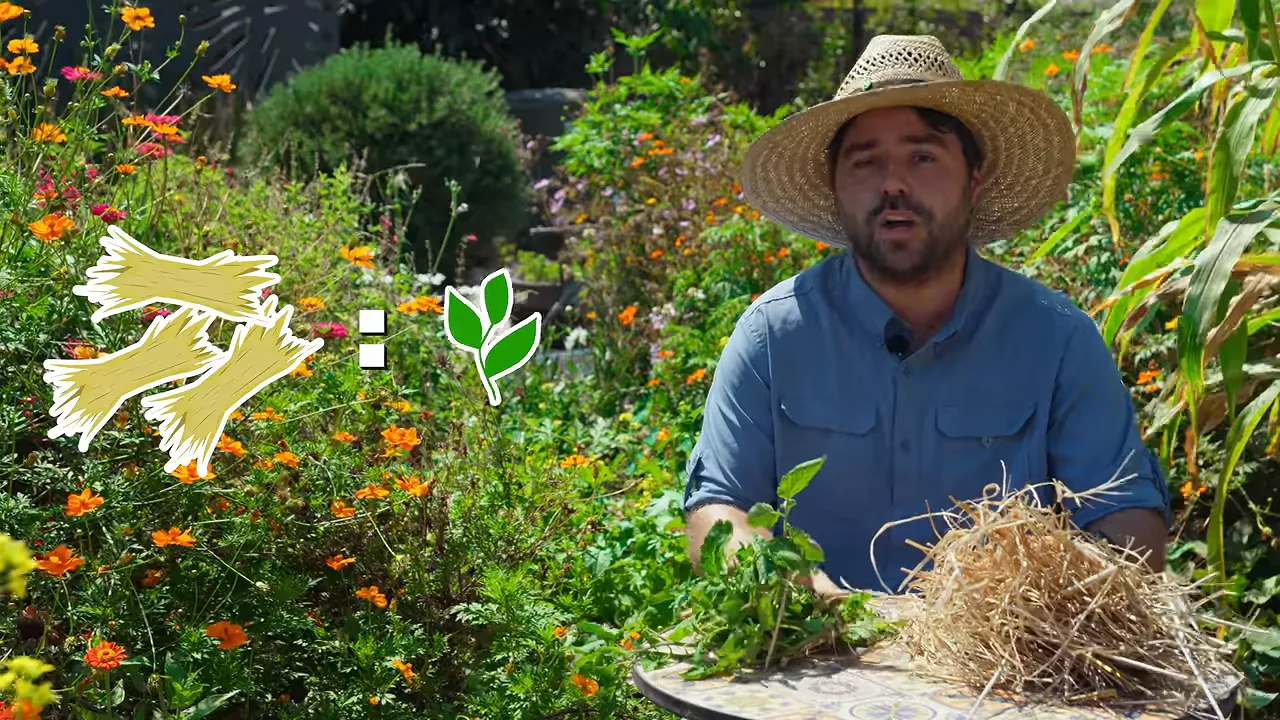
For example, after pruning tomatoes, tip a bucket of fresh leaves into the pile and add two or three buckets of whatever suitable browns you have available. The browns help create a fluffy structure, while the nitrogen supports the microbial population needed to generate heat.
Use Your Nose and a Compost Thermometer
You do not need a laboratory to notice that the balance is off. Two simple clues are especially useful:
- A funky, unpleasant smell: Too many wet greens can create a soggy pile with too little oxygen. Add browns and mix them through to help restore structure and balance.
- A pile that stays cold: Too many browns can leave the microbes short on nitrogen. If the pile is large enough and properly moist, adding greens may help it heat up.
A compost thermometer takes a lot of guesswork out of this. Instead of wondering whether anything is happening beneath the surface, you can check the temperature and see how the pile responds to changes.
Just remember that a cold pile is a clue, not a complete diagnosis. Nitrogen balance, moisture, and pile size all work together.
3. Build Enough Pile to Hold the Heat
You can shred everything beautifully and get your ingredient balance close, but a tiny pile still has a hard time staying hot.
Heat escapes through the top and sides. If the pile is too small, it loses that heat faster than its microbes can generate and retain it.
A reliable starting size is 3 feet wide by 3 feet deep by 3 feet tall, which gives you 27 cubic feet of material. Aim for roughly 27 to 30 cubic feet when planning a hot compost pile.
Pay attention to shape, too. A cylinder made from hardware cloth or metal mesh can be an inexpensive bin, but a 3-foot-diameter cylinder filled 3 feet high holds only about 21 cubic feet. It is not equivalent to a 3-foot cube. Making the cylinder closer to 4 feet across gives you more room to reach the volume you need.
Build a Batch Instead of Feeding It a Handful at a Time
Getting enough material together can be the biggest challenge, especially when you are starting a garden. I certainly did not have the perfect quantity of greens and browns ready to go when I first started gardening on this property.
The more effective approach was to gather enough ingredients, then build the pile as a batch. That gives microbial activity a strong start and enough mass to sustain the heat.
Adding a few scraps every day will still lead to decomposition, but it is a different approach from assembling a full pile intended to heat up quickly.
4. Keep the Moisture Right Throughout the Pile
Microbes need water just as much as we do. In a compost pile, they live and work in a thin film of moisture around the particles. When that film disappears, activity slows or goes dormant.
The moisture target is roughly 50 to 60 percent. If that number means absolutely nothing to you in the garden, use the squeeze test instead.
- A drop or two comes out: You are in the right neighborhood.
- A stream of water comes out: The material is too wet. Mix in dry browns.
- The material feels dry and releases no water: Add moisture and mix it through.
The easiest time to get moisture right is while you are building the pile. Add a light spray of water as each layer goes in, rather than expecting water applied at the very top to reach everything evenly.
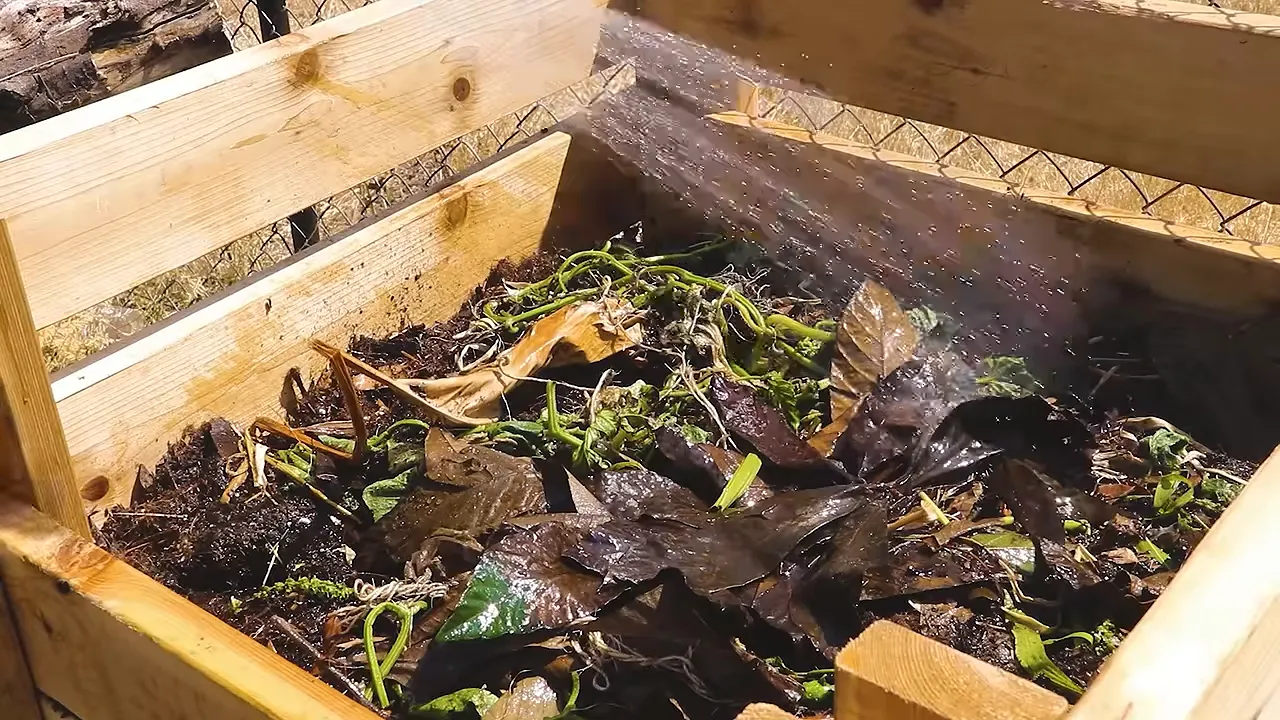
You can fix an already dry pile with a hose, but turn or mix it as you water. A wet surface does not tell you much about the conditions deeper inside. The goal is moisture distributed through the material, not just a damp-looking top.
5. Turn the Outside Material Into the Hot Center
Turning compost is important, but its purpose is a little more interesting than simply adding oxygen.
Yes, turning introduces fresh air. But active microbes consume that oxygen quickly. A well-built pile also relies on passive airflow: warm air rises out of the top, drawing fresh air inward through the spaces between the materials.
That is why particle size and coarse browns matter so much. Turning is not a substitute for building a porous pile in the first place.
A major benefit of turning is moving less-decomposed material from the outside into the active center. The core gets hot and breaks down rapidly, while material along the sides and top can lag behind. Turning gives those outer ingredients their turn in the action.
This also explains why sanitation depends on more than a single temperature reading. Material on the edges needs exposure to the hot interior, too.
When Should You Turn Compost?
Turning every two to four days is one possible schedule during active hot composting. Our preferred approach is to let the compost thermometer guide the work.
Once the pile has heated, monitor it as the temperature rises and falls. When it cools toward about 110°F, turn it, deliberately bringing material from the top and edges into the center.
A simple five-tine fork works well. Think of the job as rebuilding the pile so the less-broken-down ingredients end up where microbial activity is strongest, rather than just fluffing the surface.
Let Compost Mature Instead of Restarting It Forever
Eventually, you will turn a pile and it will not heat back up. It is tempting to feel disappointed. But if the material has largely broken down and the other conditions are right, that can be a victory: the pile is moving into maturation.
The mistake is continually adding fresh ingredients to that same batch. Every new addition brings in material that still needs to go through decomposition, making it harder to get a finished batch out.
Keep fresh inputs separate from maturing compost. This is the practical reason for a multiple-bin system:
- Two bins: Allow one batch to mature while you start another.
- Three bins: Give you more flexibility to keep batches and stages separate.
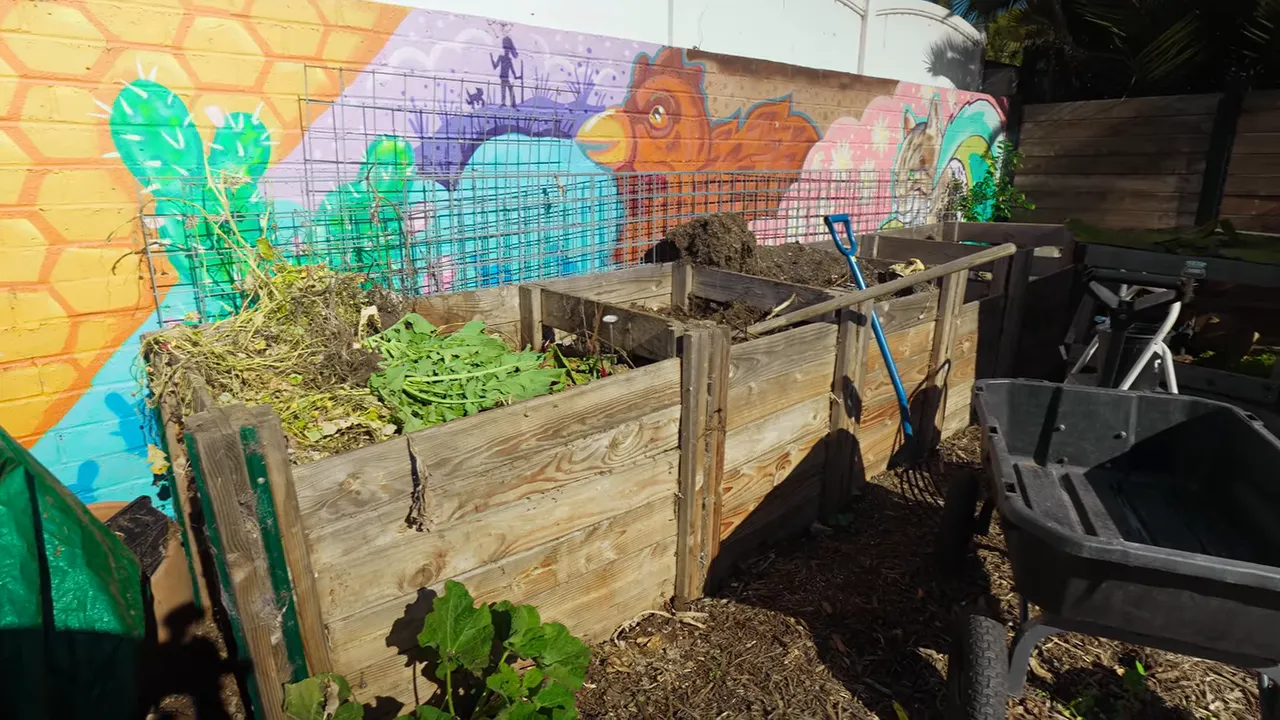
We use a five-bin system because this property produces a lot of green and brown material. You do not need to start there. A second bin alone makes it much easier to stop feeding one pile and let it finish.
The goal is not to keep compost hot forever. Heat is one stage of the process. The final cooling and stabilization stage is what gets the material ready for your garden.
Do You Need a Compost Activator?
Compost activators generally aim to do one of two things: introduce bacteria and other microbes, or add nitrogen to a pile with an unbalanced carbon-to-nitrogen ratio.
If you are struggling to gather enough greens, a nitrogen-containing product may help. But it is not a replacement for diagnosing what your pile actually needs.
Before buying an activator, check the basics:
- Are the ingredients chopped into manageable pieces?
- Is there enough nitrogen-rich material?
- Is the pile large enough to retain heat?
- Is moisture distributed throughout it?
- Can air move through the structure, and have the outer materials been turned inward?
There is nothing inherently wrong with using an activator. It is simply worth knowing that the problems it is intended to address can often be corrected through the ingredients and management of the pile itself.
Fast compost comes from creating good conditions for the life doing the work. Chop the material, balance the mix, build enough volume, keep it moist, and rotate the outside into the center. Then give the finished batch the one thing you cannot replace with more turning: time to mature.


