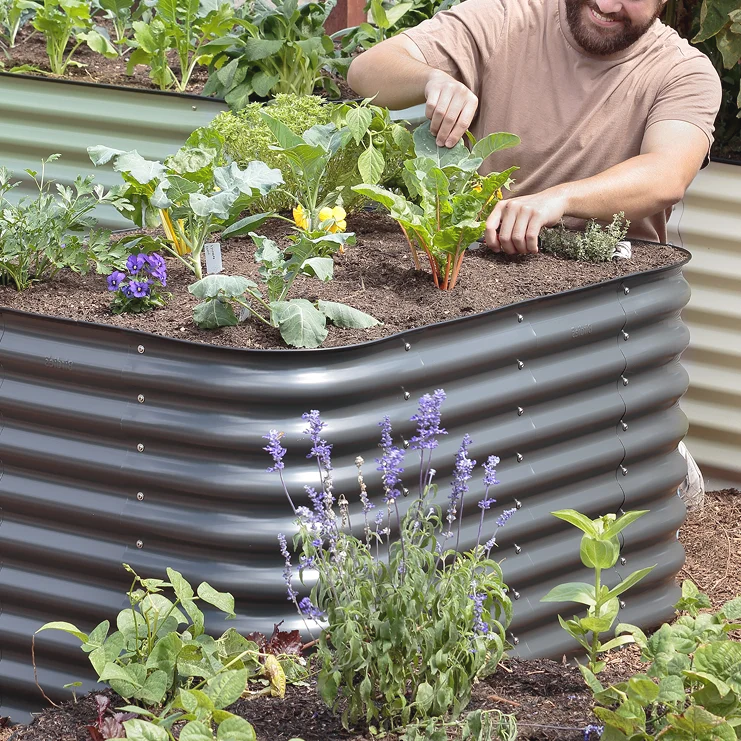
Putting logs in the bottom of a tall raised bed can save you a serious amount of money on soil. It can also create some very real problems if you treat the bed like a dumping ground, cover everything up, and hope for the best.
I still use buried logs in my garden. The beds across my front yard have wood underneath them, and Jacques and I have even dug into older beds to see what was happening below the soil. But our filling technique has changed.
The trick is not just choosing the right logs. It is placing them carefully, filling the gaps as you go, accounting for nitrogen tie-up, and leaving plenty of quality soil above the wood. Here is what works, what can go wrong, and how we now fill a tall raised bed.
Key Takeaways
- Suitable logs and organic fill can substantially reduce the soil needed for a tall raised bed.
- Keep wood low in the bed and preserve a generous layer of quality soil above it.
- Work soil and water into gaps during filling to reduce dramatic settling later.
- Plan for drainage, localized nitrogen tie-up, and burrowing pests before filling the bed.
Table of Contents
- Why Fill a Raised Bed With Logs?
- Choose Wood That Will Actually Work
- The Real Problems With Buried Logs
- How We Fill a Tall Raised Bed With Logs Now
- Why I Still Use This Method
- Our Epic Gardening Metal Raised Beds
Why Fill a Raised Bed With Logs?
Tall raised beds are fantastic for comfortable gardening. I can plant, prune, and fuss over my crops without bending nearly as much. The downside is how much soil they take.
A bed measuring 4 feet by 8 feet and 30 inches tall holds about 80 cubic feet. Depending on bag size, that is roughly 40 to 50 bags of soil. With premium mixes, filling a bed that size can run approximately $400 to $1,000.
Replacing some of that lower volume with logs and other organic materials can reduce your soil needs by about 60%, depending on how you fill the bed. That is a substantial savings, especially when the wood is free.
This is an adaptation of hugelkultur, a German growing method that layers logs, branches, twigs, and progressively smaller organic materials beneath a planting layer of soil.
Those materials gradually decompose and return nutrients to the soil. As wood decays, it can also develop a spongy texture that holds moisture. In theory, that moisture can help support the soil above it. I treat that as a potential bonus, not a reason to stop irrigating.
Choose Wood That Will Actually Work
Finding logs sounds easy until you start looking for untreated, disease-free wood of a known species. Buying expensive firewood can also eat into the very savings you are trying to create.
Wood I Would Use
Locally available hardwoods are a good place to start. Suitable choices include:
- Oak
- Maple
- Birch
- Poplar
- Apple and other suitable fruit-tree wood
- Pine or fir, which are softer but will still break down
Wood that has been sitting outside for a season can be especially useful because decomposition may already be underway.
Wood I Would Avoid
There are three different reasons to reject wood: potential effects on plants, resistance to decay, and possible contamination.
- Black walnut, butternut, and pecan: I avoid these because of concerns about juglone, a compound associated with damage to susceptible plants, including tomatoes, peppers, and potatoes.
- Cedar, redwood, and black locust: These resist decay. That can be great for building a wooden bed, but it works against the goal of creating a decomposing, moisture-holding layer inside one.
- Pressure-treated lumber, painted wood, and unknown construction scraps: These may contain preservatives, coatings, or other materials you do not want buried beneath your food garden.
The important distinction with shop offcuts is knowing exactly what they are. Clean, unfinished, untreated solid wood from an appropriate species is different from a mystery pile of construction waste.
Where to Find Affordable Logs
A local arborist supplied the logs for more than 15 raised beds in my front yard. I confirmed the tree species, then asked whether they could drop the wood at my place instead of paying to dispose of it.
That worked beautifully, although moving all those huge logs was definitely a workout.
You can also ask a custom woodworking shop about suitable untreated hardwood offcuts, or look for inexpensive firewood. Confirm the species and treatment history before you bring it home. Free wood is not a bargain if it is the wrong material.
The Real Problems With Buried Logs
The critiques of this method are not imaginary. There are legitimate issues to plan around before the bed is full.
Nitrogen Tie-Up Near the Wood
Wood has a high carbon-to-nitrogen ratio, roughly 400:1. The microbes breaking it down need nitrogen to grow and reproduce, so they draw on nitrogen in the surrounding soil.
That can temporarily reduce nitrogen availability where the wood and soil meet. If plant roots are growing right through that zone, they may face more competition for an essential nutrient.
What I do not think follows is that a few buried logs automatically rob the entire bed of nitrogen.
Roots can grow much deeper than 12 inches, but a lot of nutrient uptake for the annual crops we grow happens in the upper 6 to 12 inches. In a tall bed, keeping the logs low leaves a substantial layer of quality soil above that interface.
Our updated method also includes a light fertilizer application around the wood layer to help buffer that localized nitrogen demand.
Pests Above and Below Ground
Buried wood may attract termites or carpenter ants. Those are not primarily a vegetable-crop problem, but they are certainly insects I think about when locating a bed near a house.
My rule of thumb is to keep a log-filled garden bed roughly 10 to 15 feet from the house, aiming for at least 15 feet where practical. That spacing is a siting precaution, not a guarantee against termites.
Then there are the digging pests. We once assumed a layer of logs would stop animals from coming up through the bottom. It did not. Burrowing animals, including voles and gophers, can still reach the bed and damage crops.
Install 1/4-inch hardware cloth before filling the bed. Despite the name, hardware cloth is a sturdy metal mesh. Stainless steel is worth considering when available because it resists rust. Adding that protection now is much easier than trying to retrofit it beneath a planted bed.
Settling and Large Gaps
Fresh soil mix is fluffy. As it gets watered and settles into place, the surface drops. Logs can make that drop much more dramatic because soil falls into the spaces between them.
In extreme cases, we have seen the soil level fall 6 to 12 inches. That is frustrating enough in an empty bed. Once plants are established, it becomes much harder to correct.
The solution is to fill those gaps while you can still see them, rather than waiting for the upper soil layer to disappear into them later.
Poor Drainage and Anaerobic Conditions
If the bottom of the bed stays waterlogged, especially over poorly draining clay, the buried material can end up in an oxygen-poor environment. That is what “anaerobic” means.
It can become foul-smelling, and roots reaching that zone will not be happy. Roots need oxygen, too.
Logs do not solve an existing drainage problem. Make sure the site can drain before committing to this method. For broader planning guidance, the University of Minnesota Extension has a useful resource on raised bed gardens.
How We Fill a Tall Raised Bed With Logs Now
The basic ingredients have not changed much. The care we put into arranging and settling them has.
1. Put Hardware Cloth Beneath the Bed
Lay down the 1/4-inch mesh before positioning and filling the bed. We leave ample coverage beyond the bed perimeter and stake it down. The exposed edges can be covered with mulch afterward.
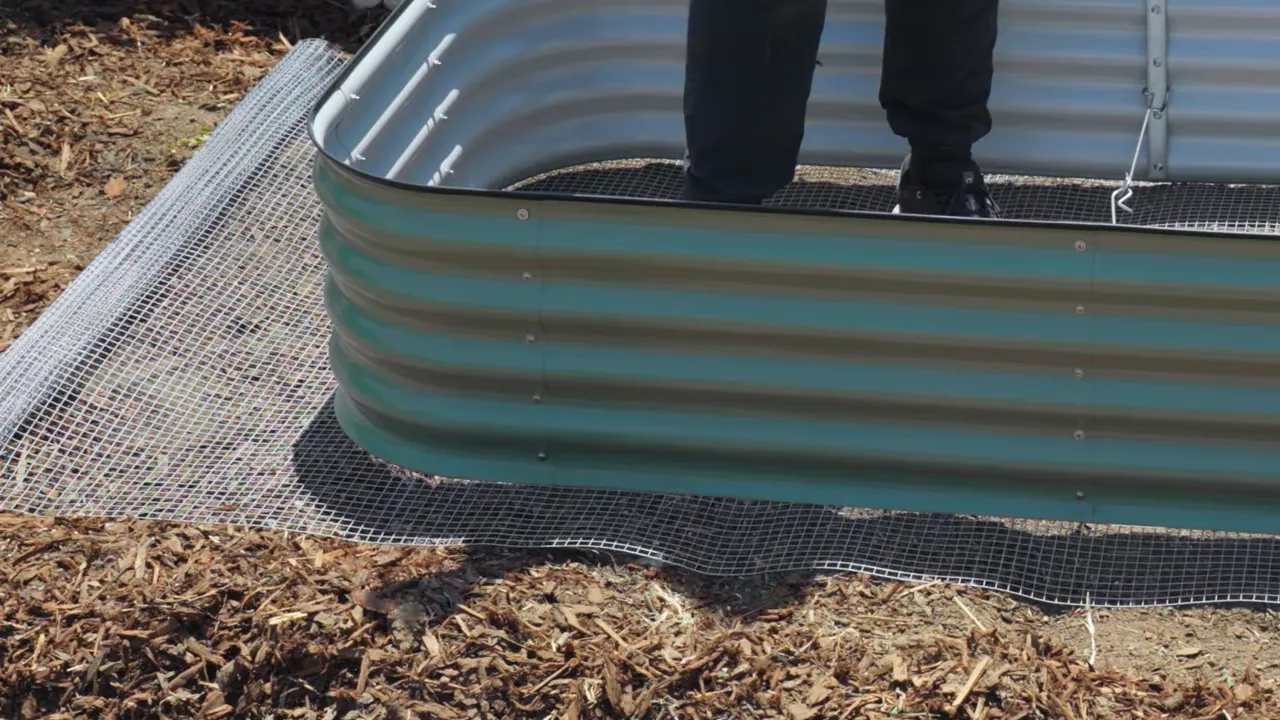
This is your opportunity to add protection from pests tunneling up from below. Do not count on the logs to do that job.
2. Fit the Largest Logs Together First
Start with the biggest pieces at the bottom. Instead of dumping them in, fit them together like a puzzle. Think garden Jenga, except the goal is a stable base with fewer large voids.
Keep the wood low enough to preserve a generous planting layer above it. Saving money on the bottom of a tall bed should not mean sacrificing the soil your crops need near the top.
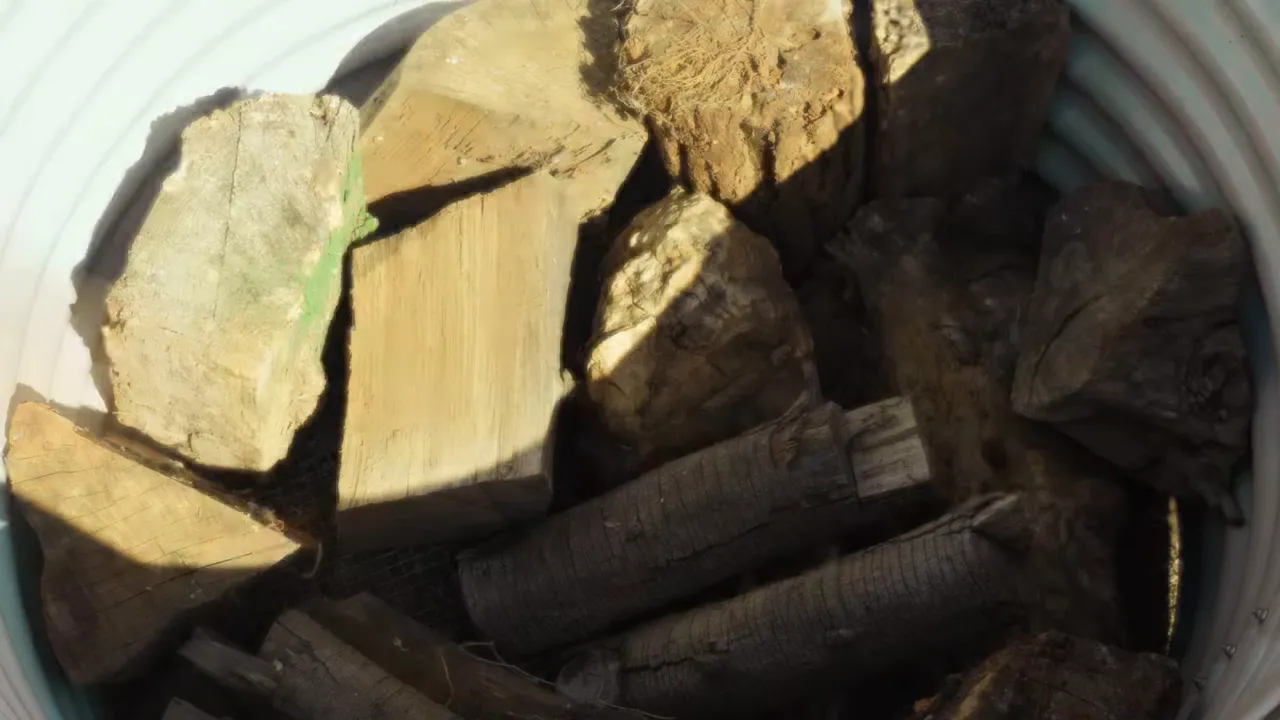
3. Wet the Logs
Give the wood a watering before moving on. Soaking it beforehand earns extra credit, but it is not necessary.
The point is to start moistening that lower layer while it is still accessible, rather than relying entirely on water filtering down through a finished bed.
4. Work Soil Into the Cracks
This is one of the biggest changes to our original technique. Sprinkle or shake soil over the logs, then water it into the gaps.
Jacques likes using the full or jet setting on the hose to push soil into the crevices. You can see where the voids are and work on them directly.
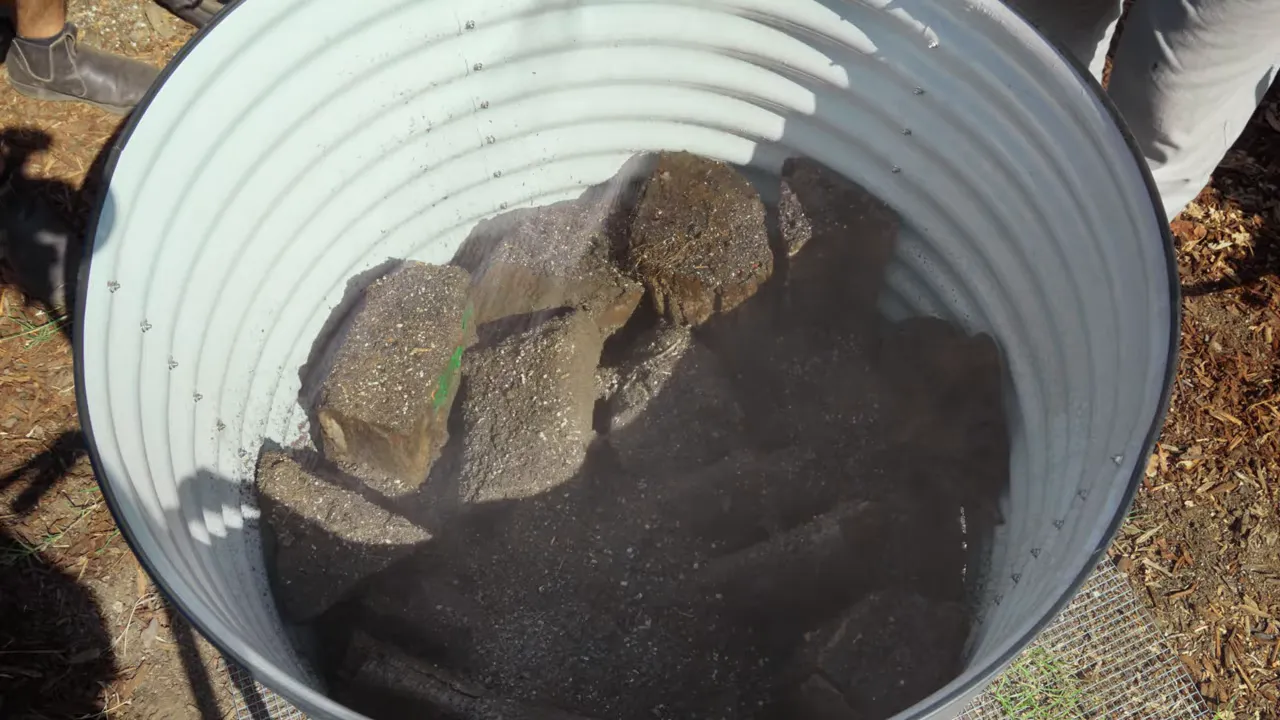
Fill the empty spaces now so the planting layer has less room to fall later. We are settling material around the logs, not trying to compact the entire root zone into a brick.
5. Add a Light Fertilizer Application Around the Wood
Apply a light dusting of fertilizer at this lower layer to provide some additional nitrogen where decomposition is likely to tie it up.
This is a buffer, not a precise formula that guarantees zero competition. Follow the fertilizer label rather than assuming more is better.
6. Add Smaller Organic Materials
Once the large wood is in place, add smaller material such as branches, twigs, leaves, grass clippings, and other yard debris. Food scraps can also go into this lower organic layer.
We work progressively smaller materials over the logs and lightly settle them into place. We also add another light fertilizer application among the yard waste and scraps.
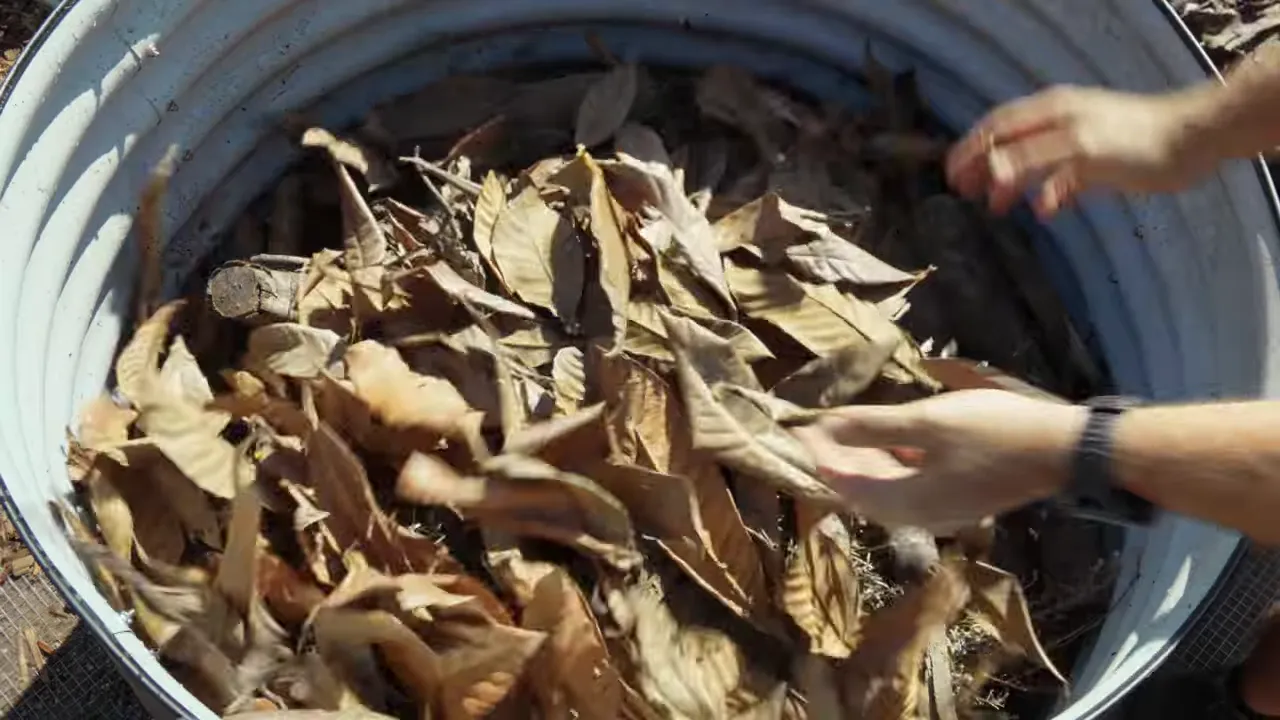
At this stage, the bed contains a lot of inexpensive or free material, the biggest gaps have been addressed, and we have accounted for some of the nitrogen demand below.
7. Finish With Quality Raised Bed Soil
Now add the growing mix. For this fill, we used FoxFarm Raised Bed & Planter Mix, one of our favorite mixes.
If you want to stretch the budget further, you can think of the soil portion as two layers. A less expensive mix could make up the lower 30% to 50% of that soil portion, with the premium mix above it.
That does not mean the lower material can be unsuitable for roots. It means directing more of your soil budget toward the upper growing zone, where much of the nutrient uptake occurs.
I sometimes add a small dose of organic fertilizer near the top as well, particularly when we plan to plant intensively with crops such as strawberries, tomatoes, peppers, or beans. That is optional. Account for fertilizer already included in the mix and follow the product directions.
8. Slightly Overfill, Water, and Let It Settle
Even with careful gap-filling, some settling is normal. We slightly overfill the bed so the surface starts a little above the rim.
Water thoroughly to saturate the mix and begin wetting the granular fertilizer. Moisture also helps the soil microbes get to work breaking down organic fertilizer.
Jacques likes to leave a freshly filled bed for a day before planting so it has time to settle. That gives you a chance to check the level before plants are in the way.
Why I Still Use This Method
Filling raised garden beds with logs is neither a miracle trick nor an automatic mistake. It is a practical way to reduce soil costs when you have suitable wood, a tall enough bed, and a site that drains.
The revised approach is straightforward: choose the right wood, protect the bottom from burrowing pests, fit the logs carefully, wash soil into the gaps, and keep a substantial layer of quality growing mix above them.
That preserves the part I love, saving money on the lower volume of a tall bed, while reducing the problems that come from simply throwing in a pile of logs and covering it up.
Our Epic Gardening Metal Raised Beds
After seven or eight years of growing in metal raised beds, bringing a line under the Epic Gardening name was a big milestone for us. Our previous partnership with Birdies was fantastic. Developing our own beds gives us control over design changes and ongoing improvements alongside our seed trays, grow bags, and Botanical Interests seeds.
We introduced the Epic Metal Raised Beds with a limited lifetime warranty and a 120-day trial program, subject to the program terms. We also had the beds undergo safety testing and made the results available on our site or by request.
The line launched with familiar sizes and colors, with plans for additional models, shapes, possible new colors, and accessories. It is a foundation we are excited to keep building on, one garden at a time.
|