Grow bags are one of my favorite ways to grow a container garden. They encourage beautifully branched, well-aerated root systems, fit into spaces where an in-ground garden would never work, and can produce a serious amount of food.
But treating a fabric grow bag exactly like a plastic pot can leave you with a disappointing harvest. The very thing that makes grow bags useful, their breathability, also changes how you need to size, water, feed, and position them.
After more than six years of growing in fabric containers, these are the mistakes I would fix first. Most come back to one simple idea: give those excellent roots enough soil, moisture, and nutrition to do their job.
Key Takeaways
- Size grow bags for vigorous roots and moisture loss, especially in dry climates.
- Water the entire root zone because runoff can hide dry, water-repellent potting mix.
- Adapt mulch, drainage, saucers, and placement to your climate rather than following one universal setup.
- Replenish nutrients and organic matter so existing potting mix can support another crop.
Table of Contents
- Why Grow Bag Roots Behave Differently
- 1. Choosing a Grow Bag That Is Too Small
- 2. Expecting the Original Potting Mix to Feed Plants Forever
- 3. Letting Potting Mix Dry Out, Then Mistaking Runoff for Proper Watering
- 4. Using the Same Setup in Wet and Dry Climates
- 5. Ignoring What Your Grow Bags Are Sitting On
- 6. Leaving Unused Bags Full of Wet Soil Through Freezing Weather
- 7. Throwing Away Potting Mix Instead of Refreshing It
- Work With the Fabric, Not Against It
Why Grow Bag Roots Behave Differently
Before changing anything in your garden, it helps to understand what is happening inside the bag.
In a plastic pot, roots eventually reach a solid wall. With nowhere else to go, they can follow that wall around the container, circling the sides and bottom. Over time, that can create a tightly root-bound plant. Woody roots may even constrict one another, and the tangled root ball becomes more difficult to transplant successfully.
A fabric grow bag creates a different boundary. When root tips reach the breathable edge and encounter drying air, their growth stops there. The plant responds by branching behind those tips instead of continuing around the container. This is called air pruning.
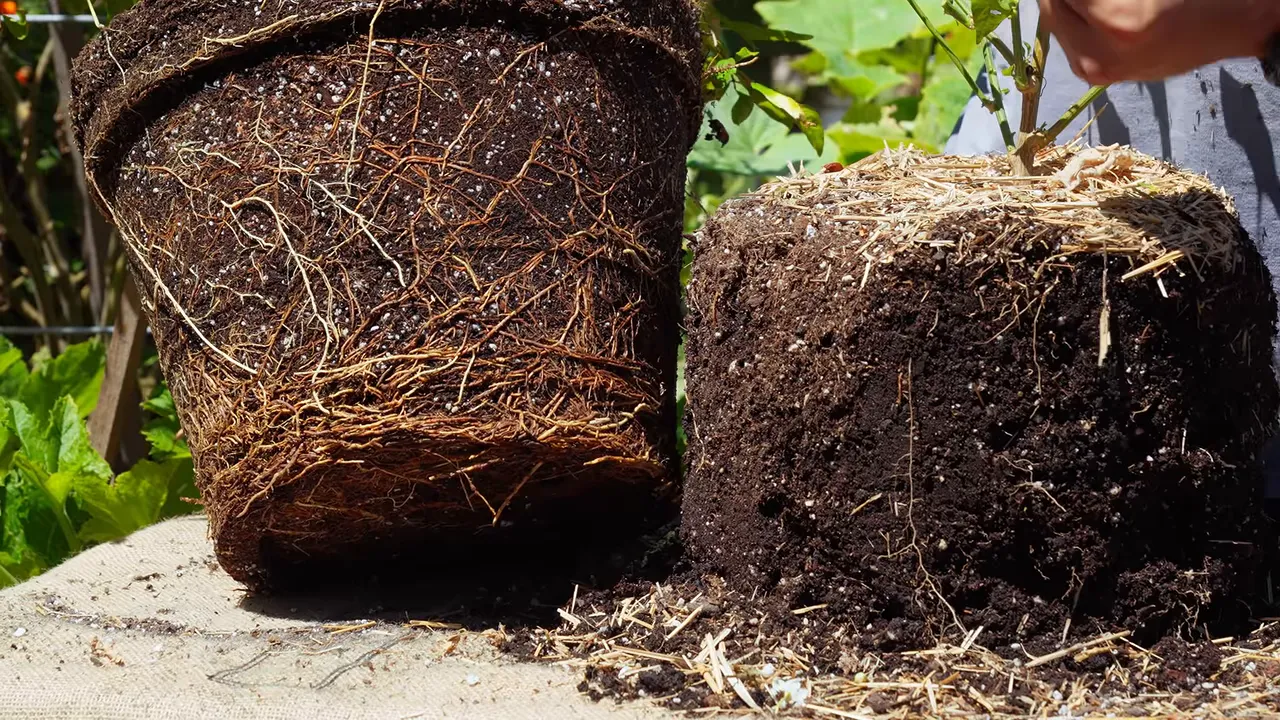
When I opened a grow bag containing an Aji pepper, the root ball had fine, wispy roots extending throughout the mix. Beside it, a pomegranate removed from a plastic pot had roots following the pot’s circumference. They are different plants, but the comparison makes the container effect easy to see.
That fibrous root system is exactly what we want. The catch is that a vigorous plant in a breathable container can use its limited resources quickly. That is where the mistakes begin.
1. Choosing a Grow Bag That Is Too Small
My general starting point is to go up a size from the plastic container you would normally choose, especially in a dry climate.
Roots can fill a fabric container quickly, and moisture escapes through the sides as well as the top. A little extra soil volume gives you more room for roots and a larger moisture reserve.
5-gallon grow bags: peppers and herbs
A 5-gallon grow bag is useful for plants that do not develop an enormous root system right away. I grow bell peppers in this size, and it also works well for basil, thyme, and sage.
Peppers develop relatively slowly, so they can perform nicely in a 5-gallon bag. In an extremely dry location, though, I would start with at least 10 gallons rather than fight to keep a small bag watered.
10-gallon grow bags: a useful middle ground
A 10-gallon bag gives peppers more room and can accommodate a determinate tomato if you keep up with watering. It is also useful for flowers, herbs, and potatoes.
I tend to favor 15 gallons over 10 for crops such as potatoes, but 10 gallons has its place. In a very wet climate, it can be a useful compromise between a small container and a much larger volume of soil that stays wet longer.
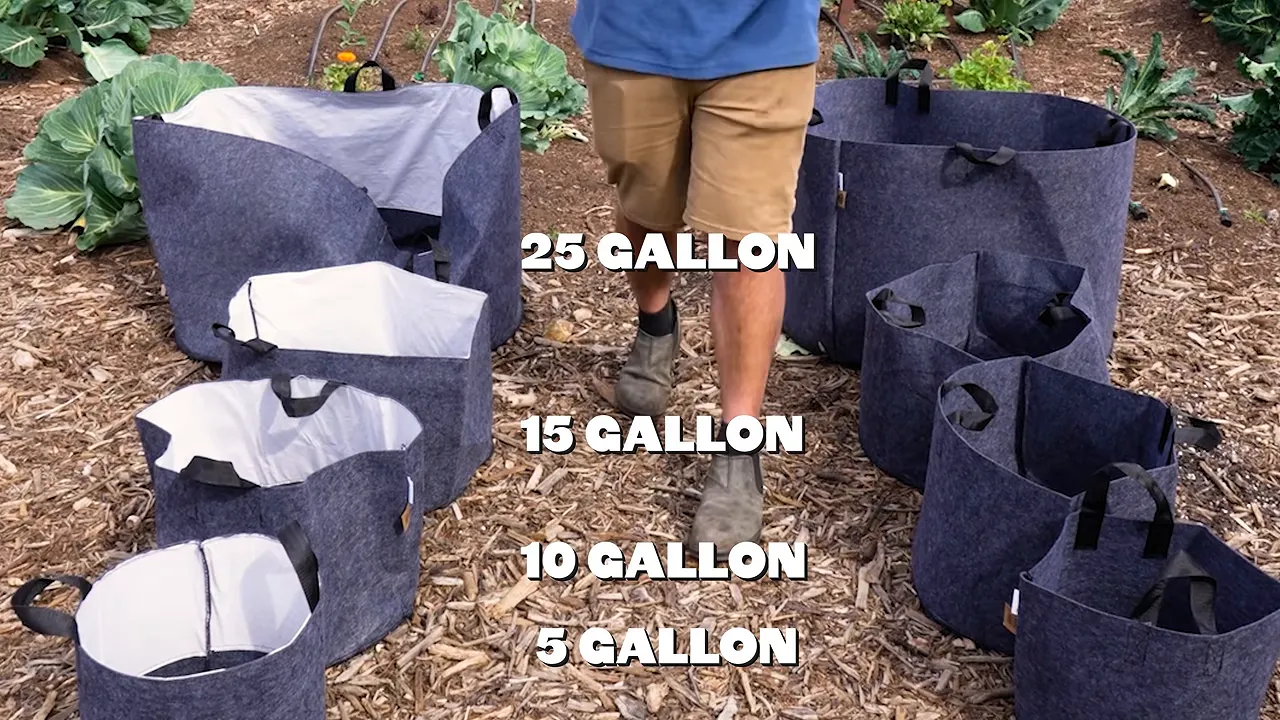
25-gallon grow bags: think of them as small raised beds
Once you get to 25 gallons, you have options beyond a single small plant. Some ways I use that space include:
- Blueberries: A large container lets you manage an acidic growing mix separately from your native soil.
- Indeterminate tomatoes: The extra root space supports a long growing season, including roughly six months of growth in my conditions.
- Multiple peppers: A large bag can accommodate a group, such as four pepper plants, rather than one.
- Potatoes: Around three plants in one large bag can give you a single substantial harvest to manage.
- Sweet potatoes: A large bag provides space for a vigorous crop while making harvesting more contained.
Bigger is not automatically better in every climate, but undersizing is an easy way to make grow bag gardening harder than it needs to be.
2. Expecting the Original Potting Mix to Feed Plants Forever
A tomato planted in the ground can send roots outward and downward in search of nutrients. A tomato in a grow bag has access only to what is inside that bag.
That does not mean every plant requires fertilizer immediately. Your potting mix may already contain nutrition. But a productive container crop, especially a heavy feeder such as a tomato, can exhaust that supply. Without replenishment, you may end up with a smaller plant and substantially less food.
I use two main approaches: granular organic-based fertilizer for steady feeding, and liquid fertilizer when I want nutrients available more quickly.
Granular fertilizer for a steady supply
Organic-based granular fertilizers contain ingredients that soil organisms break down over time. Alfalfa meal, for example, does not instantly become plant food the moment you scatter it onto a container.
The slower breakdown is an advantage. It provides a continuing supply of nutrients without requiring you to fertilize at every watering.
- Move the mulch aside, if the container has any.
- Make a shallow trench in the potting mix, no more than about an inch deep.
- Add the amount recommended on the fertilizer label for your container and crop.
- Lightly incorporate it and cover it with soil.
- Water the fertilized area so moisture and soil organisms can begin the breakdown process.
In my containers, granular feeding often falls somewhere around every two to four weeks, depending on the product. The label takes priority over a generic schedule or a spoonful used in another container.
I like Happy Frog granular fertilizer from FoxFarm. You do not necessarily need a tomato-specific product, but do choose a formulation suited to the plants you are growing.
Liquid fertilizer for faster availability
Liquid fertilizers with readily available nutrients work more quickly than materials that still need substantial microbial breakdown. Mixed with water according to the label, they deliver nutrition directly to the root zone.
That can be useful when a plant appears short on nutrition and you do not want to wait for a granular feeding to become available. Container-grown citrus is another situation where I sometimes want a quicker nutrient response.
The trade-off is frequency. Liquid feeding may be a weekly task rather than something you do every few weeks. Follow the product’s dilution and application directions rather than assuming a stronger dose will work better.
3. Letting Potting Mix Dry Out, Then Mistaking Runoff for Proper Watering
Here is a frustrating situation: you pour plenty of water onto a grow bag, water rushes out the bottom, and the surface looks dark. Surely it is watered.
Not necessarily.
When I tested this with very dry peat-based mix, most of the water traveled through the container without soaking into the bulk of the soil. Scraping beneath the surface revealed dry material. The bag barely felt heavier afterward.
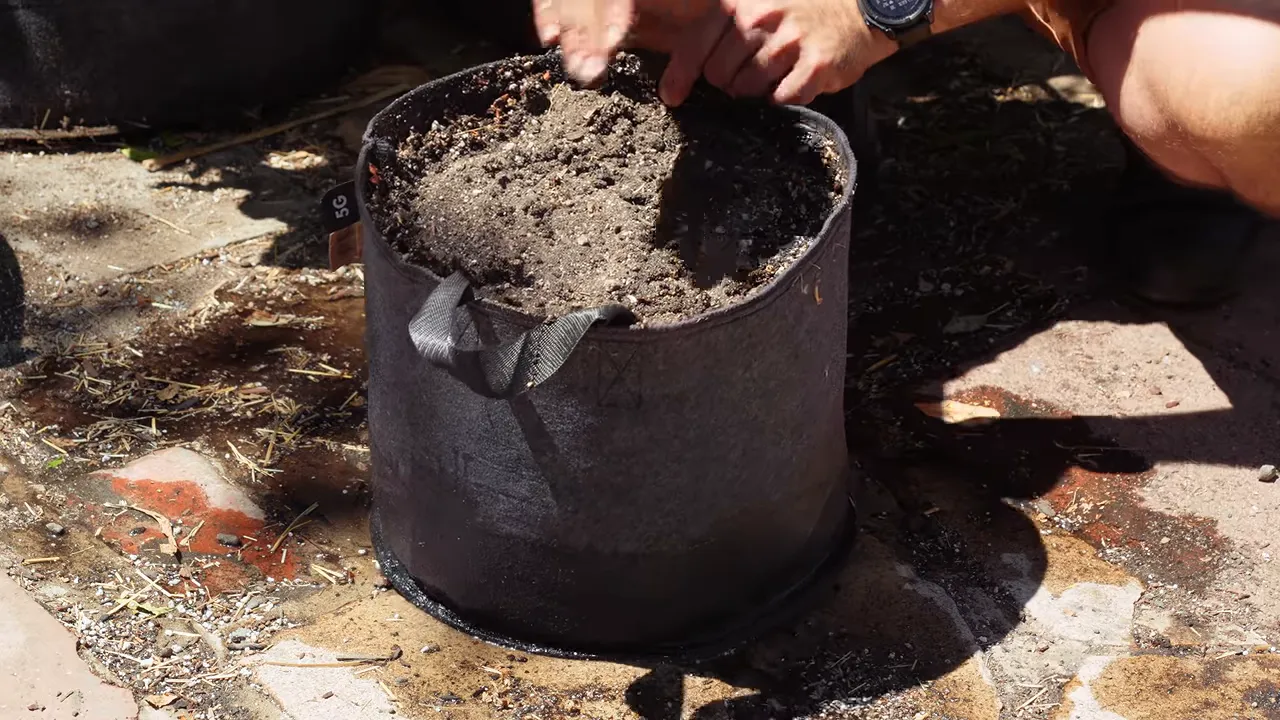
Understand hydrophobic peat and dry pockets
Peat holds moisture well when it is hydrated. If it dries too far, however, it can become hydrophobic, or water-repellent. Water then finds an easier route through gaps and channels instead of wetting the entire root zone.
In a grow bag, this often begins around the outside, where the mix dries fastest. Inconsistent watering can leave dry pockets along the edges while the center stays moist.
I found exactly that in a bag that had held basil. Part of the root ball remained intact, but another section crumbled away when I opened the fabric because it was so dry.
This is not a reason to rule out peat-based potting soil. Much of my container garden uses it. It is a reason to understand what runoff can hide.
Use a mix that fits your watering habits
FoxFarm is Epic Gardening’s soil sponsor, and I use its mixes throughout my container garden. Happy Frog, made with ingredients including aged forest products and peat, is my usual all-purpose choice for annual crops.
I have also been using Coco Loco, a coconut coir-based mix. Coir generally rewets more readily than thoroughly dried peat, which makes it useful when keeping containers evenly moist is a challenge.
Because coir-based mixes can cost more or be harder to find, I often blend Coco Loco with Happy Frog. The coir throughout the mix helps absorb and redistribute water. I do not use a fixed ratio here; the goal is to improve moisture management in a mix I already like.
Even with a more forgiving mix, preventing severe drying is easier than correcting it.
Water the whole root zone, not just the surface
A proper watering should moisten the entire volume of potting mix, then allow excess water to drain. Dry soil sitting unused along the edges is wasted growing space.
For my driveway garden, drip irrigation makes that consistency much easier. Those bags are out of sight enough that relying on my memory is not a great system.
Here is how I calculate the delivery from one setup:
- I use 1/4-inch drip tubing with emitters rated at 1/2 gallon per hour.
- Four emitters deliver a combined 2 gallons in one hour.
- Running those four emitters for 30 minutes delivers approximately 1 gallon.
That is an example of the calculation, not a universal watering prescription. The runtime needs to match your bag size, mix, crop, and weather. Check that the water is actually spreading through the soil instead of escaping through dry channels.
Fabric makes it easier for excess moisture to leave, but it does not make overwatering impossible. The aim is consistent moisture with drainage, not permanently soggy soil. The University of Minnesota Extension’s container gardening guide provides additional context on managing container water and nutrients.
Consistent watering supports even cucumber development and helps reduce moisture-related problems such as blossom-end rot in tomatoes and squash.
Mulch when moisture loss is the problem
A grow bag can lose moisture from every exposed surface. Leaving the top bare adds another place for sunlight and moving air to dry the mix.
Mulch reduces surface evaporation, moderates temperature, and helps keep the upper soil from becoming another dry pocket. In most of my dry-weather containers, drip irrigation and mulch are the two biggest improvements I can make.
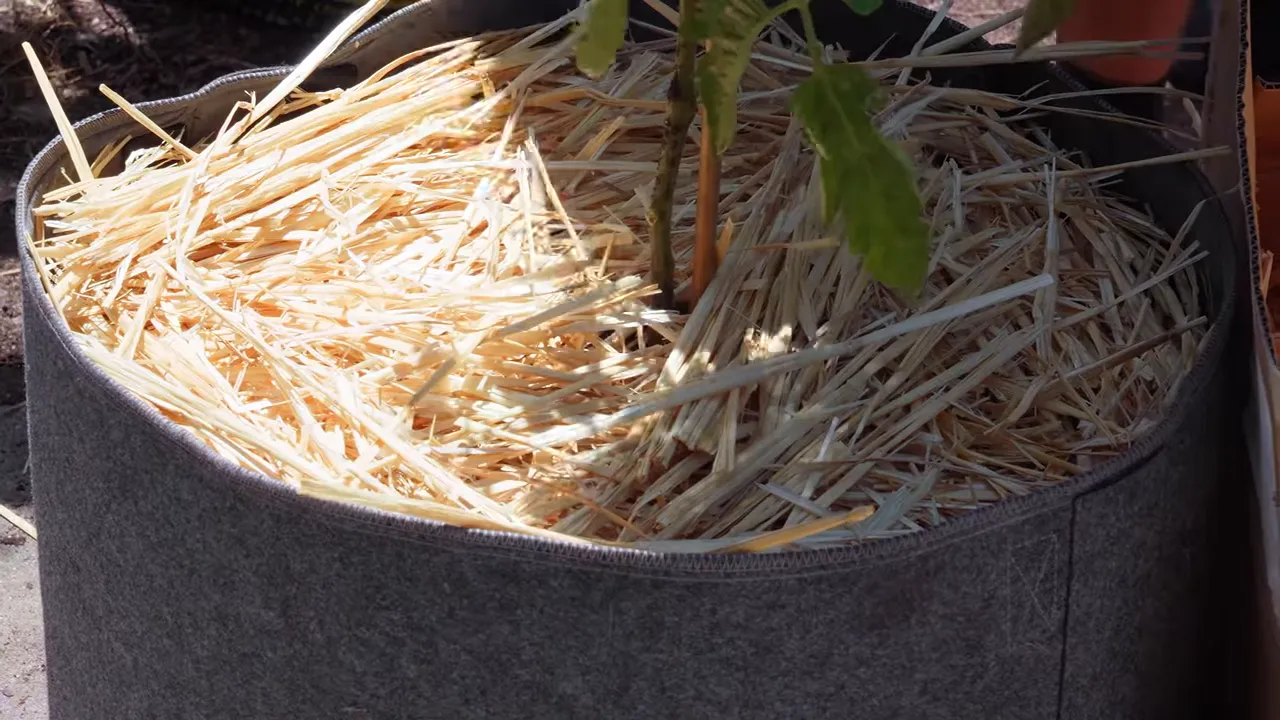
There is one important exception: if your climate is already keeping the soil too wet, holding onto more moisture may be the last thing you need.
4. Using the Same Setup in Wet and Dry Climates
A grow bag in a humid, rainy garden needs a different setup from one in a hot, arid garden. Before adding mulch, amendments, stands, or saucers, decide which problem you are solving: too much retained water or too little.
For rainy, humid conditions, prioritize drainage
The ability to shed moisture through the sides makes fabric containers particularly useful in wet conditions. Still, roots need oxygen, and even a grow bag can stay too wet.
- Skip moisture-conserving mulch when the mix is already staying wet. An exposed surface can help it dry.
- Add aeration where needed. Extra pumice or perlite in the potting mix creates more breathing room.
- Keep the base out of standing water. A draining gravel surface, pallet, plant shelf, or perforated stand can help water move away.
- Avoid a water-holding saucer. In this situation, retaining runoff works against your goal.
A raised, perforated stand is useful because it separates the bag from a wet surface and leaves the bottom open to drainage.
For dry, arid conditions, conserve moisture
In an arid garden, the same extra airflow can dry a bag faster than you can keep up with it. Reverse the strategy.
- Choose moisture-retentive ingredients. Coconut coir-based mixes or vermiculite can help hold water.
- Consider a partially lined grow bag. An upper liner reduces moisture loss while leaving the lower portion breathable.
- Use mulch. A solid inch on top can make a meaningful difference.
- Reconsider elevated stands. More dry air moving beneath the bag can increase water loss.
- Use a saucer when appropriate. It can catch runoff and give dry mix time to wick water back upward.
A saucer is especially helpful when water initially runs through a dried-out container. Instead of immediately losing that water, the bag has another opportunity to absorb it from below. Keep the goal in mind, though: rehydration, not a permanently waterlogged root zone.
5. Ignoring What Your Grow Bags Are Sitting On
Placement is about more than finding an empty patch of space. The surface beneath a bag can affect heat, evaporation, and whether roots remain contained.
Do not isolate bags on a hot slab of concrete
A driveway or patio can become extremely hot in the middle of the day. A lone grow bag surrounded by exposed paving is vulnerable to that heat, which can stress roots and dry the mix rapidly.
I grow on pavers, concrete, and brick, but my setup has two advantages: some dappled tree shade and containers grouped close together.
Grouping containers shades more of the surrounding surface and creates a cooler pocket than a few isolated bags on a large slab. Other options include shade cloth or wood chips spread around the containers to cover exposed ground.
The goal is not to remove all sunlight from your crops. It is to avoid cooking their root zones against a heat-soaked surface day after day.
Do not assume fabric keeps roots out of the ground
Remember that air prunes roots. If the bottom of a grow bag stays in contact with moist soil, roots may grow through the fabric into the ground rather than stopping at the bag’s edge.
Sometimes that is useful. Those escaped roots can access additional moisture and nutrients.
But it defeats the purpose if you chose containers to avoid soilborne pests or diseases. It also matters when growing spreading plants such as mint, or vigorous sweet potatoes that you do not want establishing outside the bag.
If isolation is the goal, use a suitable stand, saucer, or other setup that breaks direct contact with moist native soil. A freely draining gravel base can also help keep the bag separated from a continuously wet soil surface.
6. Leaving Unused Bags Full of Wet Soil Through Freezing Weather
Cold-climate gardening is not something I deal with much in my own garden, but storage still matters. Wet soil expands when it freezes, and that can stress the fabric and shorten a bag’s useful life.
If a grow bag is finished for the season and you are not using it to grow anything, emptying and drying it is a practical way to protect it.
- Move the potting mix into a storage container for later reuse, or use suitable mix to top up a settling raised bed.
- Allow the empty grow bag to dry thoroughly.
- Fold it and store it in a sheltered place, such as a garden shed.
I have stored used potting mix in a large, roughly 50-gallon garden waste container until I needed it again. The soil does not have to be thrown away just because the bag is being put into storage.
Elaborate washing is not essential to my routine. Keeping unused bags dry and protected is the main point. With care, they should give you several years of use.
7. Throwing Away Potting Mix Instead of Refreshing It
Potting soil is not finished after one crop. You do need to replenish it, though.
Peat, coir, compost, and forest products break down over time. The soil level settles, and pulling out a large plant leaves another gap where its roots used to be. Repeatedly planting without replacing organic matter can leave you with a mix that drains much faster than it once did.
My solution is to refresh the existing mix rather than start from scratch.
How I refresh a grow bag for the next crop
- Move irrigation out of the way. Remove the staples or other pieces holding it in place.
- Save the surface mulch. Set it aside to reuse after planting.
- Add compost. Incorporate it into the upper layer to replenish organic matter. Homemade compost is a great low-cost option.
- Replenish fertilizer. This is particularly important after a heavy-feeding crop such as tomatoes. Follow the product’s rate for the container.
- Mix the fertilizer below the surface. Contact with moist mix and compost supports microbial breakdown.
- Top up with fresh potting mix. Replace the volume lost through settling and removal of the previous root ball.
- Restore irrigation and plant. In my example, a seed-grown collard replaced the tomato.
- Return the mulch. Cover the surface again where moisture conservation is appropriate.
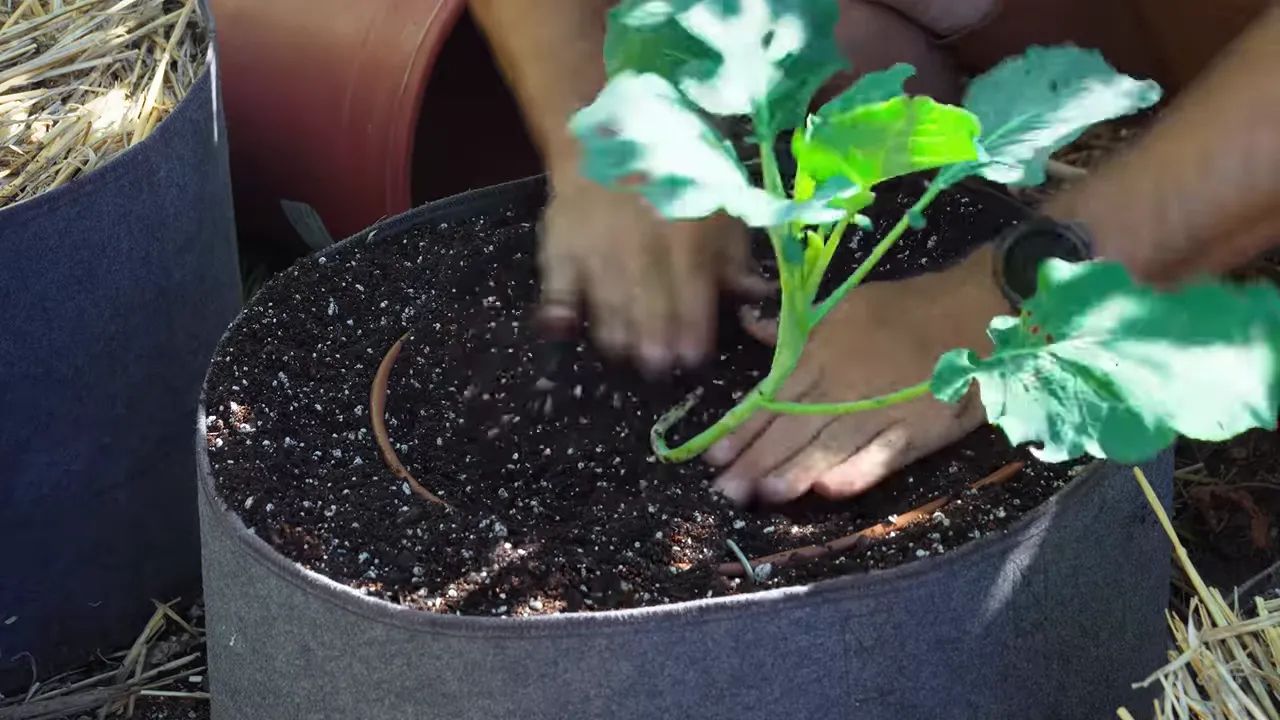
For that tomato-to-collard changeover, I kept all the remaining potting mix. The new investment was some compost, fertilizer, and enough fresh mix to restore the level.
That is one of the best parts of container gardening: once you have filled the bag the first time, you do not need to repeat that entire purchase for every crop.
Work With the Fabric, Not Against It
Grow bags are excellent containers, but their advantages come with a different management routine. Give vigorous roots enough room, replenish their limited nutrient supply, and make sure water reaches the entire root zone.
Then adjust the setup to your conditions. A wet garden needs drainage and airflow. A dry garden needs moisture retention and protection from excess heat. Neither approach works everywhere.
Get those basics right, refresh the mix between crops, and your grow bags can keep producing season after season. Keep on growing.


