October is a turning point in the garden. In colder climates, frost is getting ready to pull the plug on summer plants. In warmer places, the weather is finally becoming comfortable enough to grow cool-season favorites. And indoors? Gardening season doesn’t have to end at all.
There’s still plenty to plant, but the right October pick depends on your climate and what you want from it. Some of these crops deliver a quick harvest. Others settle in for winter or set the stage for a spectacular spring garden.
From tiny microgreens to big, beautiful garlic bulbs, here are eight planting picks worth making room for this month.
Key Takeaways
- Match October plantings to your local temperatures and frost timing rather than following one universal schedule.
- Microgreens keep indoor harvests going, with many types ready in eight to ten days.
- Fall sowing can establish milkweed and larkspur for next year’s garden.
- Choose garlic suited to your climate and plant in time for root growth and cold exposure.
Table of Contents
- 1. Microgreens: Keep the Harvest Going Indoors
- 2. Milkweed: Plant a Future Food Source for Monarchs
- 3. Carrots: Sow Now for Sweet Cool-Weather Roots
- 4. Peas: Pick Your Pod, Then Give It Support
- 5. Nasturtiums: A Low-Desert Fall Favorite
- 6. Larkspur: Plant Now for a Cottage-Garden Spring
- 7. Cauliflower: Start a Cool-Season Crop in Warm Climates
- 8. Garlic: Get Those Cloves in Before Winter
- Let Your Climate Make the Final Call
- Our Soil Partner
1. Microgreens: Keep the Harvest Going Indoors
When the first frost could arrive any day, as it can in a Colorado garden in October, microgreens are a fantastic way to move that gardening energy inside.
Microgreens aren’t a special category of plants that stay miniature forever. They’re familiar garden plants harvested very young. Kohlrabi, radish, broccoli, mustard, and sunflower all make good options. Mellow Blend and Jazzy Mix are two blends we like, along with sunflower microgreens for a different texture and flavor.
Choose seeds specifically intended for growing microgreens. Don’t assume every vegetable seedling is edible at this stage. Peppers, tomatoes, and squash are not appropriate choices for this project.
Microgreens Versus Sprouts
Sprouts are typically germinated in water, and you eat the whole little plant, including its roots and sometimes part of the seed. With microgreens, you harvest only the stems and leaves above the growing medium.
The harvest window arrives once the cotyledons, those very first seed leaves, have fully opened and the first true leaves are beginning to appear or have just developed.
How to Start a Tray of Microgreens
You don’t need fancy equipment. A regular seed-starting setup works well as long as it has two parts: an upper tray with drainage holes and a solid lower tray for bottom watering.
- Add the growing medium. Fill the upper tray with about 2 inches of moist coco coir or a basic seed-starting mix. The seed supplies the nutrients needed for this short growing period, so a rich potting mix isn’t necessary.
- Flatten the surface. Press another tray gently over the moist medium to create an even seedbed.
- Sow densely. Sprinkle seeds close together across the surface. You’re harvesting seedlings, not growing full-size plants, so normal garden spacing doesn’t apply.
- Mist and cover. Spray the seeds thoroughly and cover the tray to retain moisture. Light isn’t needed during the first couple of days.
- Move into light after germination. Around day three, once seedlings emerge, place the tray under lights or on a bright windowsill. Continue watering from below.
Different seeds develop at different speeds. Sunflowers, for example, may take longer than some of the smaller-seeded crops in a blend.
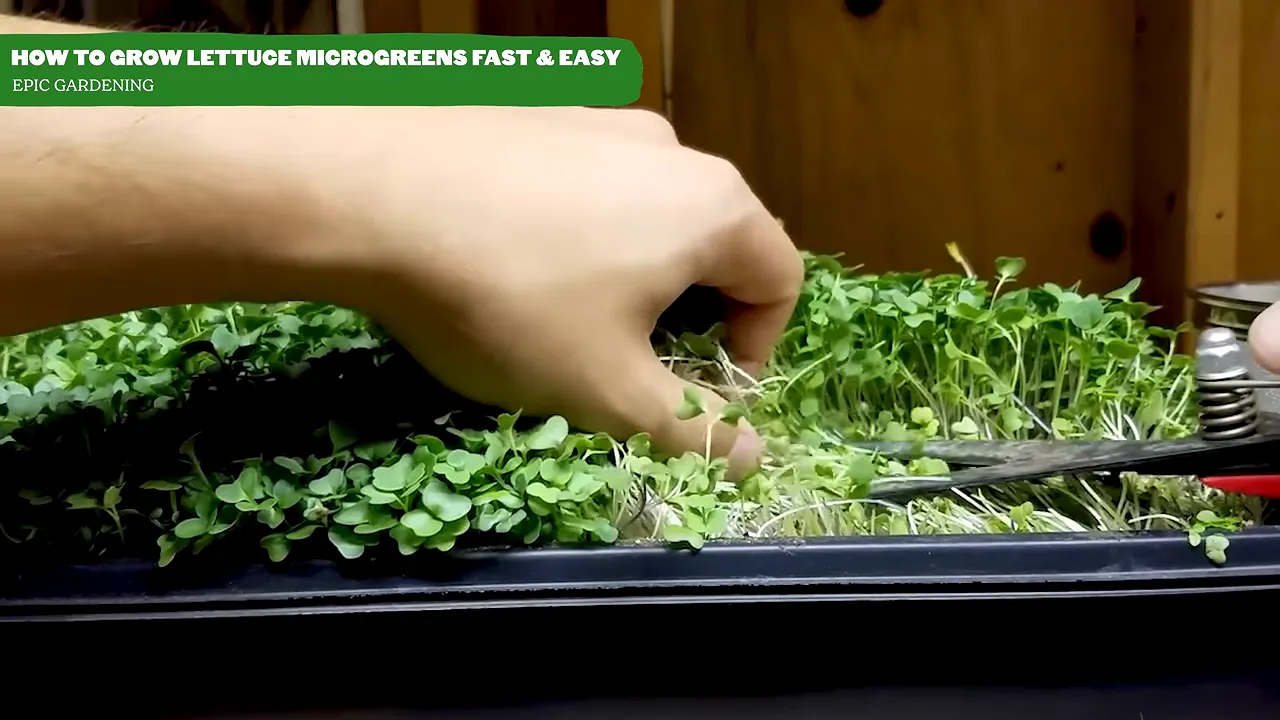
At household temperatures, some microgreens can be ready in as little as seven days. Eight to ten days is a useful harvest window for many types, but taste them as they grow. You might prefer the flavor on day eight, or you might decide to wait until day eleven. When they taste right, snip them at the surface of the growing medium.
Fast, fresh, nutrient-packed greens without worrying about the weather outside? That’s a pretty good October crop.
2. Milkweed: Plant a Future Food Source for Monarchs
Not every October planting needs to end up on your dinner plate. Milkweed earns its space by supporting monarch butterflies, whose populations have declined substantially over recent decades.
Habitat loss is an important part of that problem, and gardeners can help by creating habitat that supplies both nectar and caterpillar food.
The eastern monarch migration connects breeding areas as far north as Canada with overwintering forests in central Mexico. Across the landscape, monarchs need flowering plants to fuel adult butterflies and milkweed where they can lay eggs during the breeding season.
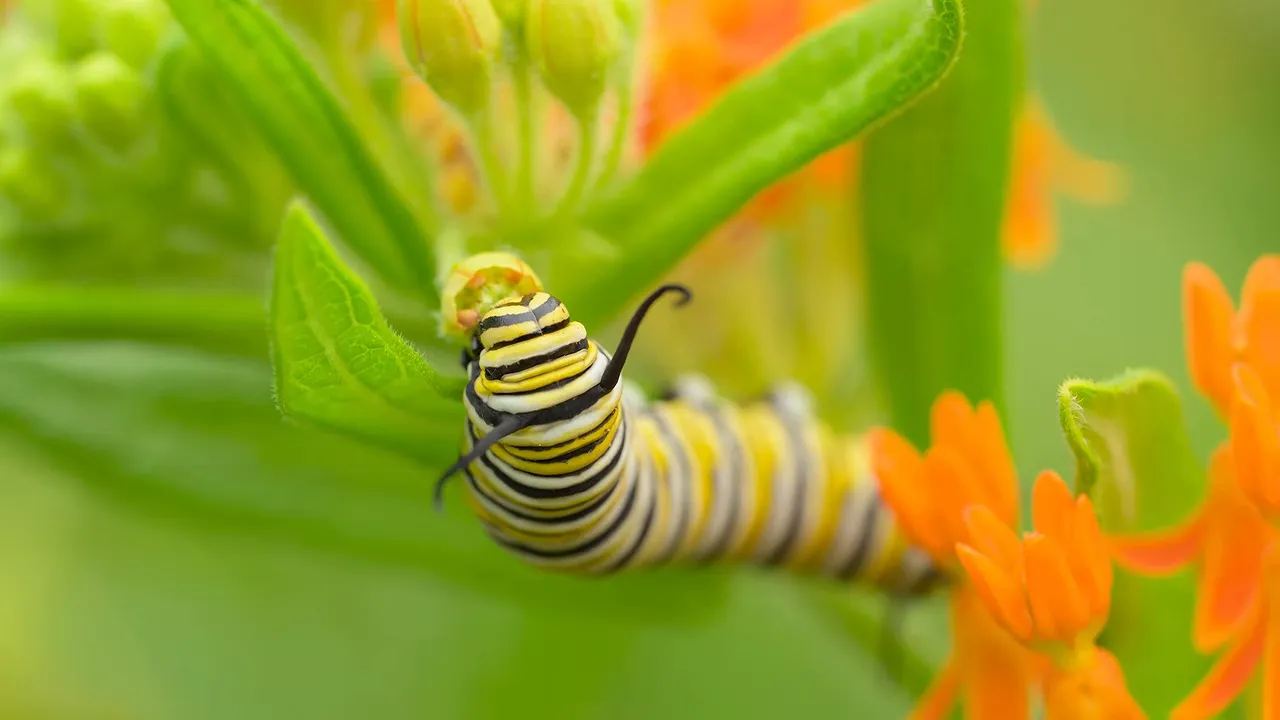
Monarch caterpillars depend on milkweed as their host plant. Nectar flowers such as Mexican sunflower help feed the adults, but they don’t replace milkweed’s role.
Choose Milkweed Native to Your Region
There are several milkweed species, and the best choice depends on where you live. In North Carolina, examples include common milkweed, with its pink flowers, and butterfly milkweed, Asclepias tuberosa. Hello Yellow is a yellow-flowered selection of the latter.
For help matching a species to your area, the Xerces Society’s milkweed seed finder is a useful starting point.
Fall sowing can be wonderfully straightforward. Scatter seeds in the intended planting area and lightly cover them with soil, about ¼ inch deep. Then let seasonal conditions do their work, with spring emergence as the goal.
It’s a small fall task that can make your garden more useful to monarchs next year, and the flowers are beautiful in their own right.
3. Carrots: Sow Now for Sweet Cool-Weather Roots
A carrot grown through cool weather is something special. Cold conditions encourage sweeter roots, making fall planting particularly rewarding.
For many gardeners in zone 7 and warmer, October is still a worthwhile time to start carrots. As they mature, carrots tolerate light frost, freezing conditions, and even some snow. In colder gardens, the wait may be much longer, and a late sowing may become an overwintering experiment rather than a quick fall harvest.
Three Carrot Varieties to Try
- Shin Kuroda: Exceptionally sweet, with very little noticeable core. A great snacking carrot that also works well in the kitchen.
- Tendersweet: A classic slender carrot with the familiar farmers market look. Good for pickling, sautéing, and eating fresh.
- Scarlet Nantes: A dependable classic with a useful shape for storage and a good option to consider where soil is heavier.
The Biggest Challenge Is Germination
If you’ve sown carrots, waited, and decided nothing was happening, you’re not alone. Carrots can take around two weeks to germinate, and the seedbed needs to stay consistently moist during that time.
That can be tricky when October still feels hot and dry. One helpful technique is to water the freshly sown seeds and cover the seedbed with cardboard to slow moisture loss.
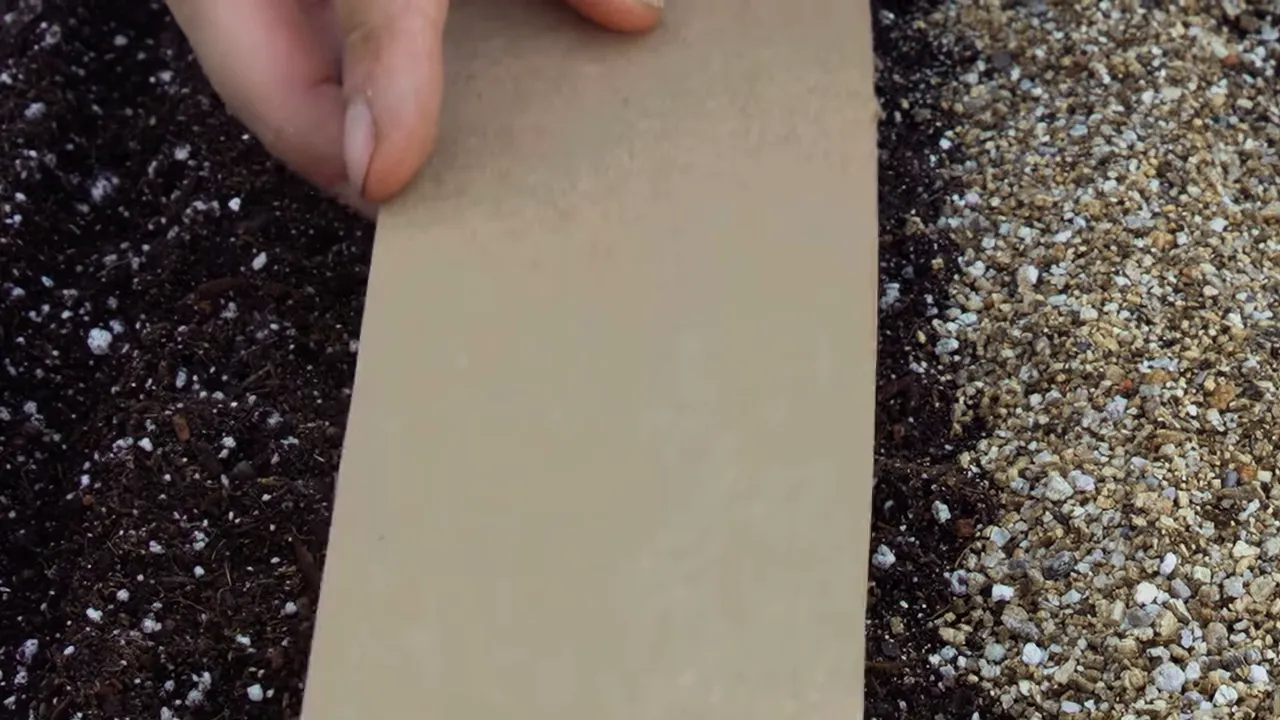
Start checking daily after about a week, and remove the cardboard as soon as seedlings emerge. The cover is there to help seeds germinate, not to keep young plants in the dark.
Cardboard isn’t automatically better in every situation. In our germination comparison, the uncovered control performed best overall. But when conditions are hot and drying, a cover can make moisture management much easier.
4. Peas: Pick Your Pod, Then Give It Support
In much of Texas, October means pea season. Garden peas love the cooler part of the year, making them a natural follow-up to summer crops.
Peas are legumes. With the appropriate bacteria in root nodules, they can fix atmospheric nitrogen. That’s a useful trait, but these cool-season garden peas shouldn’t be confused with warm-season crops such as black-eyed peas, cowpeas, or purple hull peas.
For the fall garden, there are three main types to consider: shelling peas, snow peas, and snap peas.
Shelling Peas: Grow Wando for Warmer Conditions
Shelling peas are the familiar peas sold canned or frozen. Their pods are too tough to eat, so you let the peas swell, open the pods, and remove the peas inside.
Wando shelling peas are a useful choice for warmer locations such as El Paso, Houston, and San Antonio. They’re still a cool-weather crop, but they offer a little more heat resilience than some alternatives.
Allow roughly 68 to 70 days to harvest Wando under suitable growing conditions.
Snow Peas: Harvest While the Pods Are Flat
Snow peas are the edible-podded peas commonly used in stir-fries. Golden Sweet is a favorite for its golden pods and purple flowers.
Expect a harvest around 60 days, and pick while the pods are still tender and relatively flat. Waiting until the peas inside swell too much can leave you with tougher pods.
Snap Peas: Sweet Pods With Plump Peas Inside
Snap peas combine traits of snow and shelling peas: a crisp, edible pod with nicely developed peas inside. Two good choices serve very different spaces:
- Sugar Daddy: Reaches about 2 to 3 feet tall, making it practical for containers with a small support. Allow approximately 65 to 75 days to maturity.
- Sugar Magnolia: A taller variety that needs a more substantial trellis. Expect maturity around 70 days.
Wando can also work in containers with modest support. Taller varieties, including Sugar Magnolia and Golden Sweet, need room to climb. Some pea varieties reach 6 to 8 feet, so plan the trellis before the vines take off.
How to Sow Garden Peas
Direct sowing keeps root disturbance to a minimum and is a straightforward way to establish peas.
- Sowing depth: 1 inch.
- Spacing: About 2 inches between seeds.
- Row spacing: About 15 to 18 inches.
- Germination: Usually 7 to 14 days, depending on soil temperature.
In soil above about 60°F, emergence may happen in roughly a week. If you have the space and the season for it, grow all three types. There’s no reason a smooth gardener has to settle for just one kind of pea.
5. Nasturtiums: A Low-Desert Fall Favorite
For a zone 9b garden in the low desert around Phoenix, October is a prime time to sow nasturtiums. They bring color, flexible growth habits, and a useful companion-planting role to the cool-season garden.
Choose a mounding variety for a more compact display or a trailing variety when you want plants spilling over a bed. Some trailing nasturtiums can extend 5 to 6 feet.
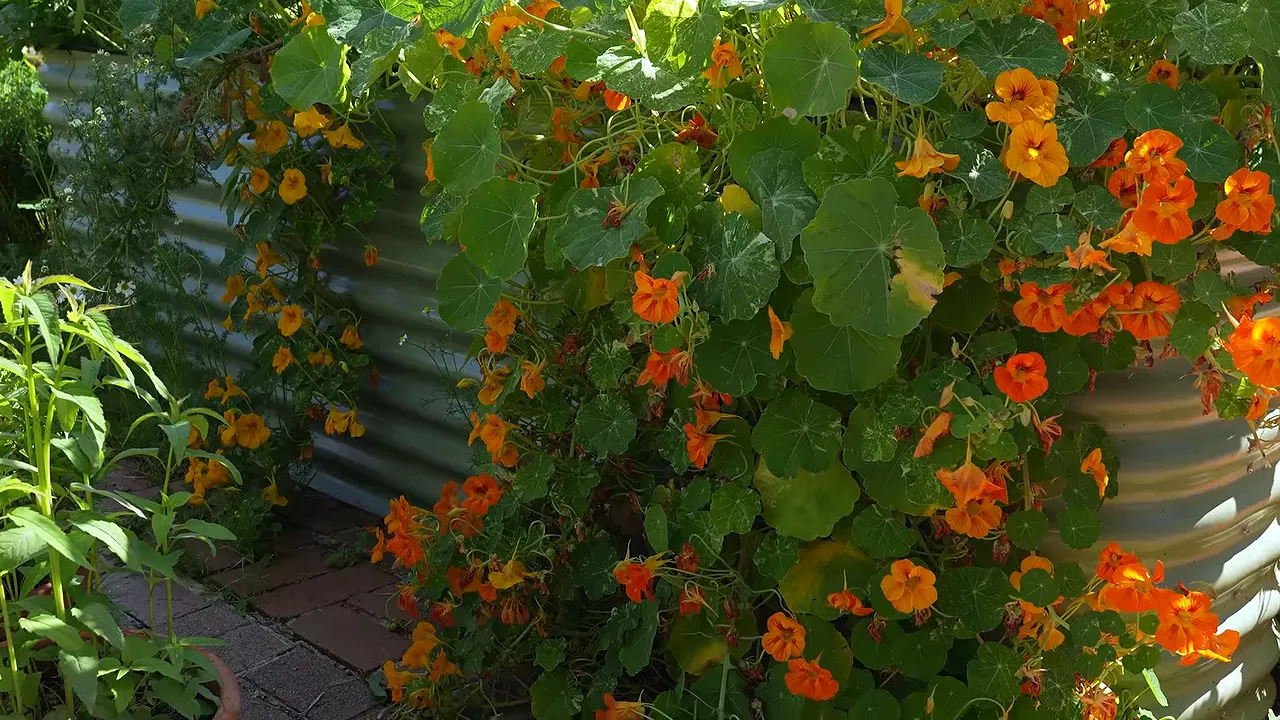
Alaska Variegated offers colorful flowers with striking variegated foliage. Purple Emperor is a trailing option with a different color palette. Whether your weakness is orange flowers or a softer mix, there’s plenty of room to match the plant to your space.
Use Them as a Trap Crop
Nasturtiums can serve as a trap crop, attracting certain pests away from plants you’d rather protect. Think of that as diverting pest attention, not making insects disappear.
They’re an easy-to-grow companion to crops that take a lot more tender loving care.
Direct Sow or Transplant Carefully
Nasturtiums are sensitive to root disturbance, so direct sowing is a sensible option. Starting them indoors is also possible if you handle the root ball carefully.
Cells with accessible bottom openings make it easier to remove a seedling without pulling it apart. Keep the root ball intact as you move it into the garden.
In the low desert, an October direct sowing can begin flowering by late January and continue into early June, before increasing heat brings the plants to the end of their cycle. That’s a long stretch of garden color from one fall planting.
6. Larkspur: Plant Now for a Cottage-Garden Spring
Some of the best spring gardens begin in fall. Larkspur is a perfect example, especially in a climate such as zone 6b Massachusetts, where October brings the cooling conditions these seeds appreciate.
Larkspur germination is hindered by temperatures above about 55°F. You can sow in fall before your average first frost or in early spring, roughly four to six weeks before the average last frost, as soon as the soil can be worked.
In a climate without much winter chill, refrigerating the seeds for one to two weeks before sowing can help provide a cool treatment.
Why Make Room for Larkspur?
- Height: Plants reach about 3 to 4 feet, giving them that tall, Victorian cottage-garden look.
- Color: Available selections include pinks, purples, mauves, blues, and mixed shades.
- Deer resistance: A useful characteristic where deer regularly browse the garden.
- Reseeding: Although annuals, larkspur can return through self-sown seed.
All parts of larkspur are toxic. It isn’t a good choice where children, pets, or anyone else may sample plants from the garden.
How to Sow Larkspur
Direct sowing avoids disturbing these sensitive seedlings. Plant groups of three seeds about ¼ inch deep, every 6 to 12 inches. When seedlings reach about 3 inches tall, thin to one plant at each spacing.
Choose full sun. In a very hot area, some partial shade can help create a cooler location, but this is still a sun-loving flower. Keep the seedbed appropriately moist as conditions require.
And the name? The projecting shape at the back of a larkspur flower resembles a lark’s spur. Whether you see a bird-foot resemblance or just a gorgeous flower spike, it’s worth planning for now.
7. Cauliflower: Start a Cool-Season Crop in Warm Climates
October is a welcome shift in Central Florida. Temperatures finally fall into the 70s, evenings cool down, and brassica season gets underway.
Cauliflower is a particularly productive choice there. It struggles with extreme heat, so waiting for cooler fall conditions makes sense. As a cabbage-family crop, it can handle some cold, although the severity of a frost or freeze still matters.
There’s more to cauliflower than white heads. Orange, purple, lavender, green, and the geometric heads of Romanesco all bring something different to the garden. Amethyst cauliflower is a standout in our Central Florida experience for its large, densely clustered, intensely purple heads.
Start in Trays and Step Up the Seedlings
Direct sowing is possible, but transplanting has given us better results in this garden.
- Sow seeds about ¼ inch deep in a good-quality seed-starting mix, using a 72-cell tray.
- Water regularly without keeping the medium continually soaked.
- Allow roughly 1½ to 2 weeks for germination.
- Move developing seedlings into 4-inch pots.
- Transplant into the garden once the plants have rooted well into those pots.
For a staggered harvest rather than a pile of heads all at once, succession sow every two to three weeks while your planting season allows.
Give Cauliflower Space, Sun, and Rich Soil
Space plants about 2 feet apart. In humid Florida conditions, that breathing room supports air circulation and helps reduce conditions that favor fungal problems. It also makes plants easier to inspect and manage.
Aim for 6 to 8 hours of direct sunlight. A little dappled shade can be workable under strong Florida sun, but a full-sun winter location is the preference.
Cauliflower is more demanding about soil than it is about germination. Give it rich, well-drained soil, using good compost or worm castings to prepare the planting site. A balanced organic fertilizer every two to three weeks, applied according to its label, helps keep these nutrient-hungry plants moving along.
8. Garlic: Get Those Cloves in Before Winter
Garlic is the October planting pick that gets us especially excited. It’s versatile in the kitchen, stores well, and gives a lot back for relatively little day-to-day attention.
But timing matters. In many climates, October is the month to plant. In warmer gardens, November may be a better fit.
The goal is to let cloves develop roots and experience the cold they need for good bulb formation. That cold exposure, called vernalization, is especially important for hardneck garlic.
Choose Hardneck or Softneck for Your Climate
- Softneck garlic: Generally the better starting choice for warm climates. Its neck becomes flexible and bends readily.
- Hardneck garlic: Generally better suited to colder climates, with a firmer central neck.
Hardneck garlic can be grown in a warm climate, but it may need two to three months of refrigeration before planting. That requires advance planning, so it may be too late to begin that process for your intended October planting date.
How to Plant Garlic Cloves
Plant individual cloves about 3 to 4 inches deep, pointy end up. Cover them with soil, then mulch with straw or another suitable material to help protect the planting through winter.
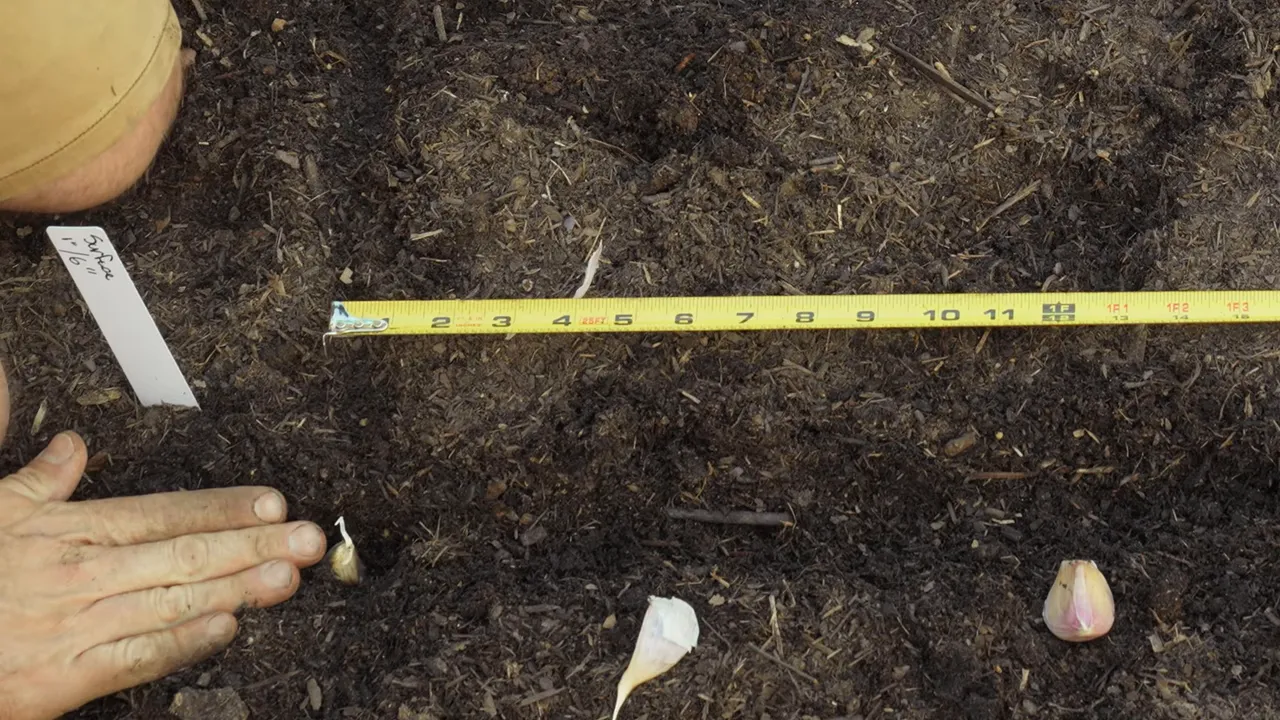
The cloves establish roots below ground while winter provides the chilling period. Harvest comes months later, with the exact timing depending on your climate and variety. In warmer growing conditions, that may be roughly five to six months after planting.
We offer planting garlic through Botanical Interests if you’re choosing varieties for your fall garden.
Let Your Climate Make the Final Call
October planting isn’t one schedule that works everywhere. A Colorado gardener may be moving indoors to grow microgreens while a Florida gardener is just getting cauliflower started. In Massachusetts, larkspur seeds are preparing for spring. In the Arizona low desert, nasturtium season is getting underway.
Match the crop to your temperatures, frost timing, and available space. A little planting now can mean fresh greens in days, sweeter roots through cool weather, or a garden full of flowers and garlic next year.
Happy spooky season, friends. Keep on growing.
Our Soil Partner
FoxFarm is our official soil partner, and we used its mixes in our gardens long before that partnership began. Its raised bed mix has performed well in our beds with sweet potatoes, flowers, peppers, and tomatoes. If you need soil for a new fall planting area, the FoxFarm dealer locator can help you find a local source.


