Growing a tomato upside down always sounded a little gimmicky to me. I’ve got plenty of room to grow tomatoes right side up, so it wasn’t an experiment I’d rushed to try.
Then someone asked what I would do with a north-facing patio that gets almost no sun. My first thought was to get a plant higher up, where it might reach more light. And if you’re hanging it anyway, why not try growing it upside down?
That question turned into a simple experiment: one Roma tomato, a 5-gallon bucket, and a couple of lettuce plants tucked into the top. After following it through flowering, fruit set, and a taste test, I was pleasantly surprised. This went from a possible gimmick to a genuinely useful option for small-space gardening.
Key Takeaways
- A hanging bucket can save ground space and improve sunlight access when positioned above obstructions.
- Choose a determinate bush tomato and provide drainage, a soil retainer, and secure overhead support.
- Tomato stems may curve upward toward light before developing fruit pulls them downward.
- Lettuce planted in the open top can provide an extra harvest from the same container.
Table of Contents
- When Growing Tomatoes Upside Down Makes Sense
- Choose a Bush Tomato and Gather Your Supplies
- How to Make an Upside-Down Tomato Planter
- Hang It Securely, Add Lettuce, and Water It In
- One Month Later: The Tomato Tried to Grow Back Up
- Two Months Later: Fruit Weight Changed the Shape
- The Final Result: More Than a Gardening Gimmick
When Growing Tomatoes Upside Down Makes Sense
The biggest reason to try this method is to use space you couldn’t otherwise plant. A hanging bucket gets your tomato off the ground and leaves the floor of a balcony, townhouse patio, or small garden available for something else.
Height can also help with light. If a fence or the edge of a covered patio shades plants near the ground, lifting a tomato may let sunlight reach it sooner.
There’s one important distinction, though: hanging a tomato higher only helps if there is actually more sun up there. Growing upside down doesn’t turn a tomato into a shade-loving crop. Before building your planter, check the light where the foliage will hang, not just where the bucket will sit. For more background on the crop’s basic needs, the University of Minnesota Extension has a useful guide to growing tomatoes.
Choose a Bush Tomato and Gather Your Supplies
I used a Roma-style saucing tomato for this project. My main recommendation is to choose a determinate, or bush-type, variety rather than an indeterminate tomato that keeps extending its growth.
A hanging planter is easier to manage when the plant has a more contained growth habit. The Italian Roma Bush tomato is the type I chose for this experiment.
Here’s what you’ll need:
- A young determinate tomato plant.
- A standard 5-gallon bucket with a sturdy handle.
- A drill and a 2½- to 3-inch hole saw.
- A ¼-inch drill bit for drainage holes.
- Burlap to keep potting mix from falling through the planting opening.
- Scissors or pruning snips.
- Good-quality potting mix.
- Strong cord, such as paracord.
- A carabiner or suitable hanging hardware and a secure attachment point.
- Optional lettuce starts for the top of the bucket.
The construction is straightforward. The only slightly tricky part is getting the tomato through the bottom without damaging its stem.
How to Make an Upside-Down Tomato Planter
1. Drill the Planting Opening and Drainage Holes
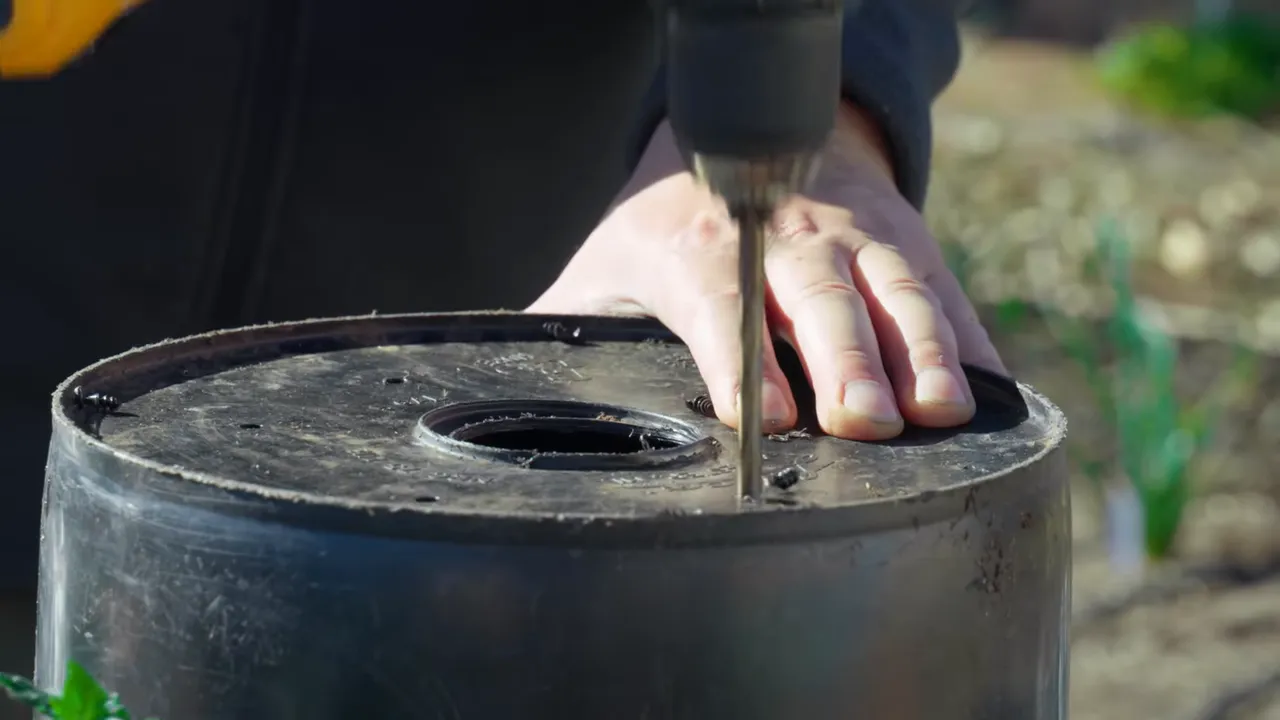
Turn the empty bucket upside down. Using your hole saw, cut a central opening in the bottom about 2½ to 3 inches across. This is where the tomato’s stem and foliage will emerge. The roots stay inside the bucket, and the handle remains at the top for hanging.
Next, use a ¼-inch drill bit to make several smaller drainage holes around that opening. Even with a large planting hole, I wanted extra drainage so water wouldn’t collect in the bottom of the container.
2. Make a Burlap Soil Retainer
That big hole needs to let the tomato through without letting the potting mix spill out around it. My solution was a simple piece of burlap.
- Cut a circle of burlap large enough to cover the inside bottom of the bucket.
- Fold it in half and make a small cut at the center.
- Fold it the other way and make a second cut, creating an X.
- Place the burlap inside the bucket, with the X centered over the planting hole.
The cuts create little flaps that let the tomato pass through while keeping the surrounding opening covered. Cardboard is another material you could use, but burlap was easy to work with for this setup.
3. Prepare the Tomato
Remove the tomato from its nursery pot and inspect the root ball. Mine had healthy roots, so I didn’t feel a need to loosen them.
Then trim off the lower foliage that would otherwise end up inside the bucket. This makes the plant easier to thread through the opening and keeps those leaves from being buried in potting mix.
Tomatoes can produce roots along buried sections of stem, which makes them well suited to this kind of planting. You’re clearing a short section near the root ball, not stripping the whole plant.
4. Thread the Foliage Through the Bottom
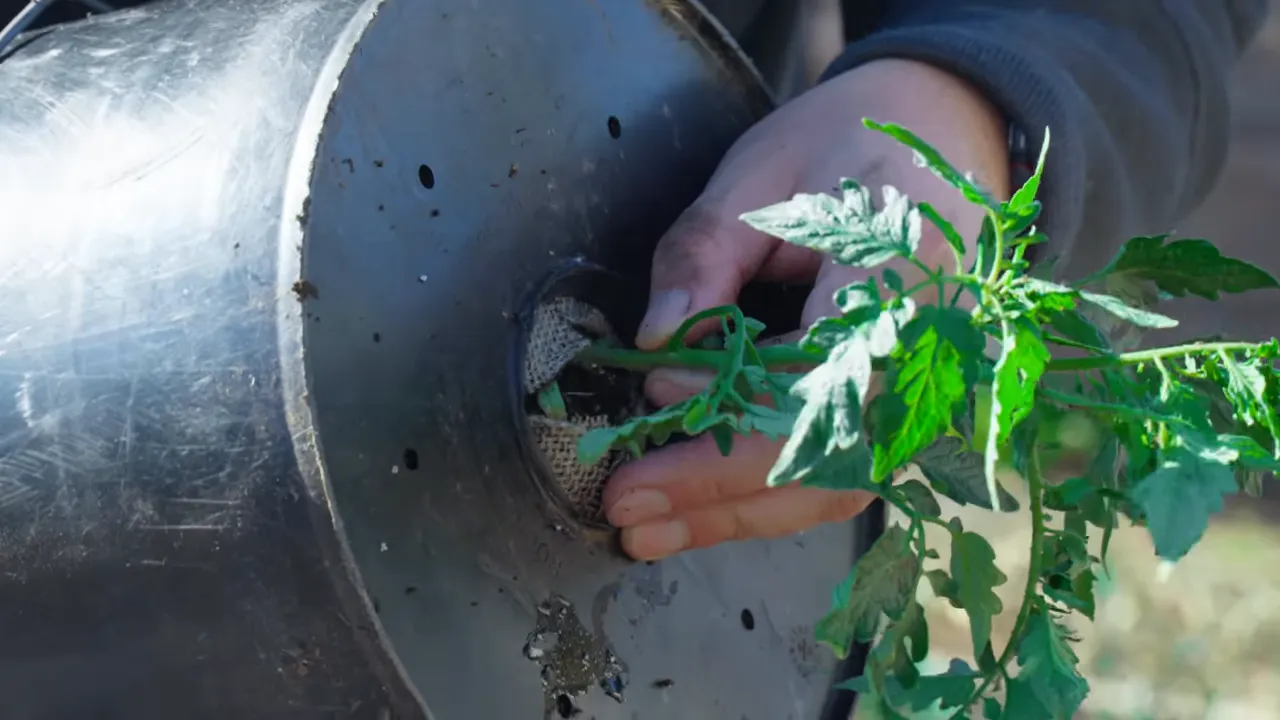
With the burlap in place, carefully guide the tomato’s foliage from inside the bucket through the X and out through the bottom hole. Keep the root ball inside.
This takes a little patience. Gather the foliage gently and work it through without forcing or sharply bending the main stem. Once the plant is in position, the burlap flaps and the root ball help keep the mix from falling out.
5. Support the Bucket and Add Potting Mix
Now return the bucket to its normal upright position, with the tomato hanging below it. Set it at the edge of a sturdy work surface so the plant has room to hang freely rather than being crushed underneath.
I managed this on my own, but a friend makes it easier. One person can steady the bucket and protect the stem while the other adds mix.
Gently scoop good-quality potting mix around the root ball. You don’t absolutely have to fill the entire bucket, but I preferred giving the tomato roots more growing room rather than leaving much of the container empty.
Hang It Securely, Add Lettuce, and Water It In
A bucket full of potting mix, water, and a growing tomato gets heavy. The handle, cord, hardware, and overhead attachment all need to support the full load.
For my setup, I chose paracord, with roughly 30 to 50 pounds of load in mind. Treat that as a reminder of the weight involved, not a universal guarantee. Your own filled planter and its attachment point need to be assessed together.
I folded the cord in half, passed the folded loop around the bucket handle, and pulled the two loose ends through that loop. Then I tied an overhand knot with the doubled cord to create an attachment for a carabiner. In the greenhouse, I clipped the assembly to an eye hook mounted in the frame’s channel.
Your hardware may be different. The important part is choosing a secure attachment, checking it before lifting, and getting help if the bucket is awkward to handle.
Use the Open Top for a Bonus Crop
There’s no reason the top has to stay empty. I tucked a couple of lettuce starts into the exposed potting mix, turning the bucket into a top-and-bottom planter.
The idea was to get an extra harvest while letting the lettuce act as a living mulch over the surface. As it filled out, it would help shade the mix and retain moisture.
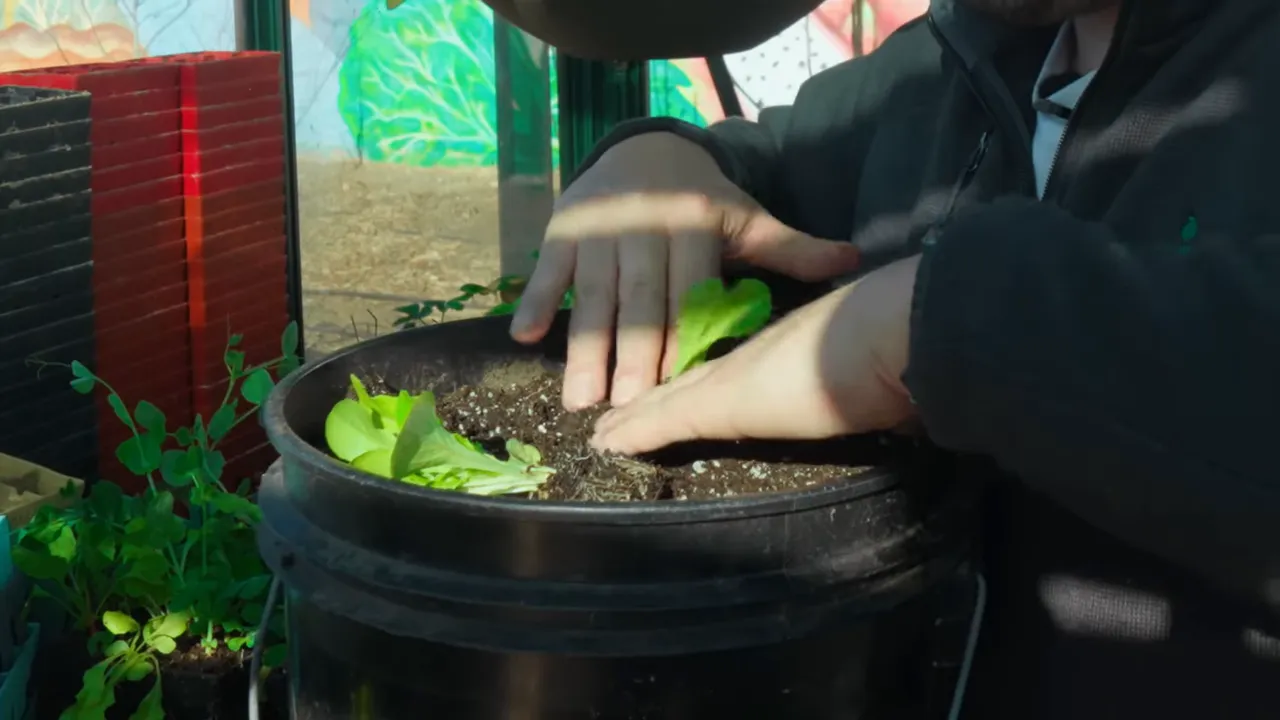
Once everything was planted, I carefully lifted the bucket into place and watered it from the top. That open top remains your watering access, even though the tomato itself is growing out of the bottom.
One Month Later: The Tomato Tried to Grow Back Up
At the one-month check, the lettuce was growing nicely. That alone was encouraging: the top of the bucket was becoming productive space rather than just exposed potting mix.
The tomato looked healthy, too, but its shape was a little weird.
Even though I’d planted it pointing downward, the growing stem was turning toward the sunlight. Instead of continuing straight down, it began forming a U shape.
Tracing the main stem took a closer look. One long section that initially looked like a stem was actually a large leaf. The true growing stem was bending outward and upward toward the light.
Planting a tomato upside down doesn’t mean its new growth will obediently keep pointing down. In this case, the unusual shape wasn’t accompanied by obvious poor health. I found several flower clusters, so the plant was moving along toward fruit production.
Two Months Later: Fruit Weight Changed the Shape
By the two-month check, the experiment had another surprise for me. The tomato still wanted to grow upward, but its developing fruit was starting to pull it back down.
As more tomatoes set and gained weight, the plant took on more of the downward-hanging shape I’d expected at the beginning. I hadn’t anticipated the fruit itself doing that much of the work.
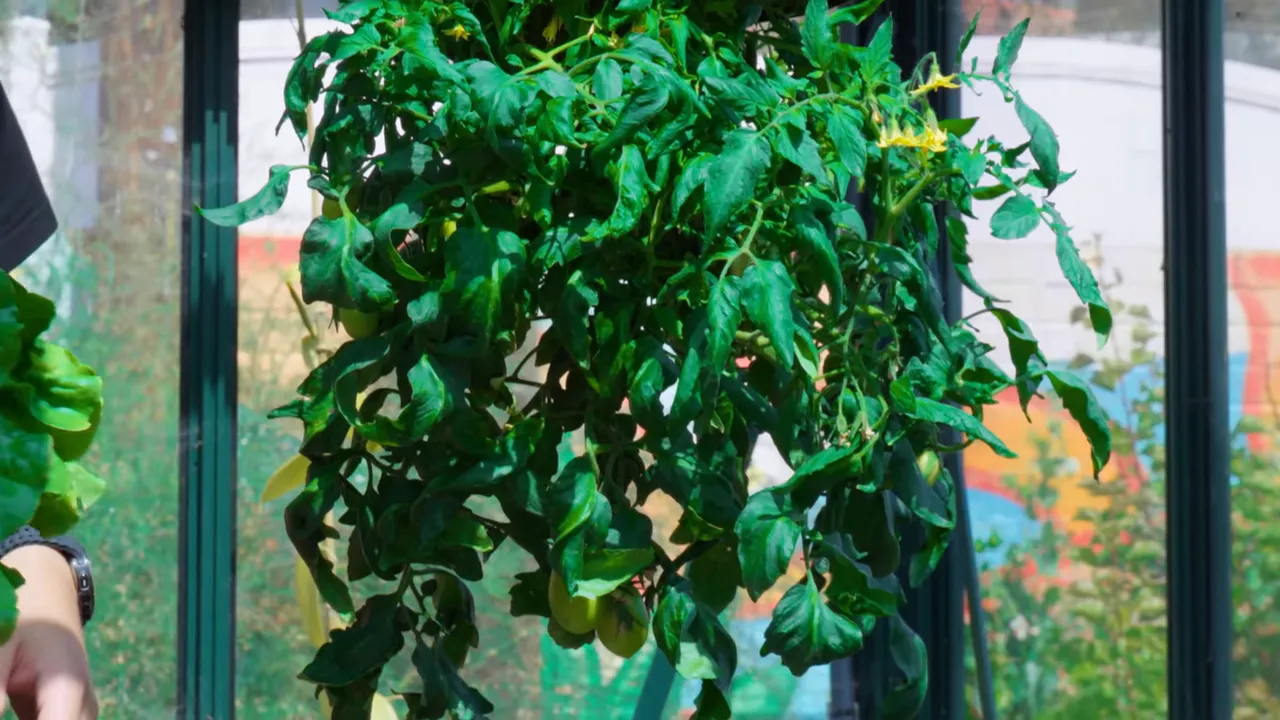
That’s one reason I liked the Roma choice. Its fruit added some heft to the hanging growth. I could imagine heavier tomatoes pulling downward even more, but I didn’t test beefsteaks in this setup. My practical recommendation remains a manageable bush tomato, with a Roma-style variety being a good starting point.
The lettuce was ready to harvest before the tomatoes. I cut a generous bonus crop from the top while the fruit below was still green. By the end of the experiment, I’d gotten a couple of lettuce harvests from that otherwise unused space.
What About Pests and Disease?
Keeping the plant several feet above the ground was another benefit I appreciated. It separated the tomato from direct contact with garden soil, which can be useful when soilborne problems are a concern.
Still, I wouldn’t treat hanging as complete protection from pests or disease. The important result here is narrower: this particular plant finished with very little evidence of serious leaf disease, compared with problems I’ve had on some of my in-ground tomatoes.
That’s encouraging, but it’s an observation from this grow, not a promise that an upside-down planter prevents every problem.
The Final Result: More Than a Gardening Gimmick
The real test, of course, was whether I’d get a tomato worth eating. I picked a ripe fruit, tasted it, and it was genuinely nice. The plant had done more than survive an odd planting arrangement. It had produced tasty tomatoes.
Here’s what made the method worthwhile for me:
- It used vertical space. The tomato grew below a hanging bucket instead of occupying ground-level planting space.
- It offered a way to reach better light. In the right location, elevation can lift foliage above some obstructions.
- It supported two crops. Lettuce grew in the top while tomatoes developed underneath.
- The plant stayed in good condition. I saw little serious leaf disease during this experiment.
- The tomatoes tasted good. The unusual orientation didn’t stop the plant from delivering an enjoyable harvest.
Would I replace all my regular tomato beds with hanging buckets? No. But for a balcony, small townhouse garden, or patio where usable planting space is limited, I’d absolutely consider it.
Start with a determinate tomato, give it good potting mix, make sure the hanging system can handle the weight, and choose a spot with plenty of sun. Expect the stems to curve toward the light at first, and don’t assume that unusual growth means the experiment is failing.
I started out skeptical. A productive tomato underneath and a couple of lettuce harvests on top made a pretty convincing case. Good luck in the garden, and keep on growing.


